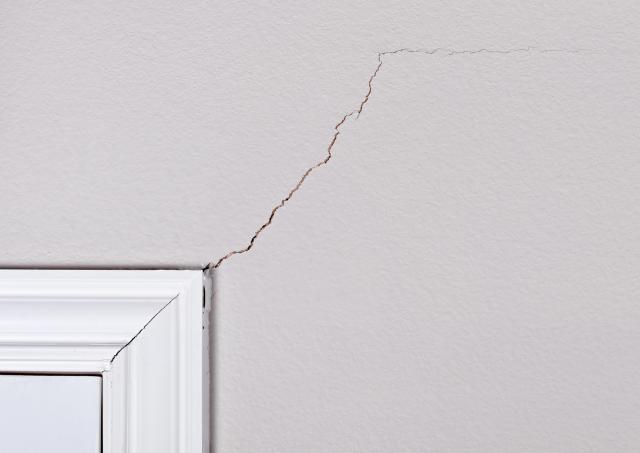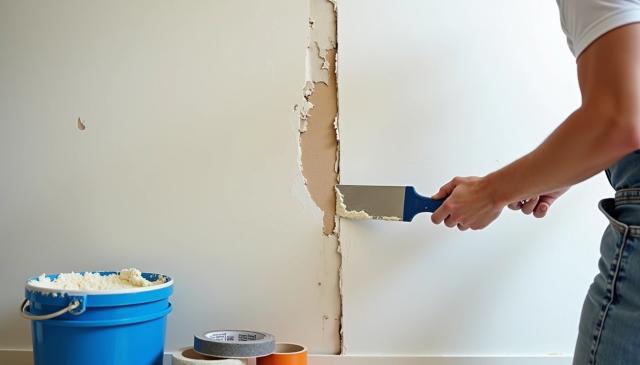
Drywall Crack Repair: Causes, Fixes, and Prevention Tips
Drywall cracks appear in nearly every home at some point, whether they show up suddenly after a s...

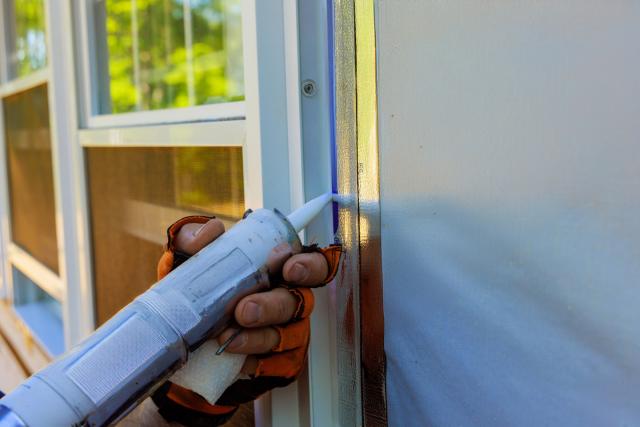
Leaky windows allow 25%-30% of your home's heat to escape, making exterior window caulking one of the most important maintenance tasks you can tackle. This simple project becomes especially critical before colder months arrive, when heating costs climb and drafts become noticeable. Caulking seals gaps between window trim and frames, preventing air, water, and insects from entering your home. The task also improves energy efficiency by eliminating air leaks and stops water from penetrating walls, where it can cause mold or structural rot. Most window caulk lasts about 5 years, depending on weather conditions. Experts recommend annual inspections and recaulking when visible cracks appear or when you notice higher energy bills. The type of caulk you choose makes a significant difference in both appearance and durability. This guide covers professional techniques for caulking exterior windows, protecting your home while creating clean, polished results.
Proper exterior window caulking creates a sealed barrier between your home and outside elements. Quality caulking goes beyond filling gaps—it protects your investment and improves your living environment.
Poorly sealed windows significantly impact your energy consumption. Gaps around window frames allow heated or cooled air to escape, forcing your HVAC system to work harder and driving up utility costs.
Properly applied exterior window caulk delivers measurable benefits:
|
Energy Efficiency Benefits |
Impact |
|---|---|
|
Prevents air leaks |
Eliminates drafts and temperature fluctuations |
|
Reduces HVAC strain |
The system doesn't compensate for leaks |
|
Lowers utility costs |
Up to 25%-30% of home heat loss occurs through leaky windows |
|
Creates consistent indoor temperatures |
Maintains comfort throughout seasons |
Caulking window frames eliminates gaps between trim and windows, preventing air from entering your home. This maintenance task becomes especially important in regions with extreme temperature variations.
Failing window seals allow moisture infiltration, which causes the most damaging problems. Without proper caulking, rainwater seeps through gaps and becomes trapped in your walls.
Moisture penetration creates several serious issues:
Mold cannot survive without water, and cracked caulk allows rainwater to leak into your home. This trapped moisture creates ideal conditions for mold spores to grow on materials like drywall.
Pro Tip: Choose silicone-based exterior window caulk for maximum moisture protection. Silicone remains permanently waterproof, crack and shrink-proof, and flexible once dried, providing superior long-term protection against water infiltration.
Quality caulking enhances both appearance and durability. Professional exterior window caulk creates clean, smooth lines that give your home a well-maintained look.
Properly applied caulking makes windows look polished, adding a clean finish to your home's exterior. This visual improvement also represents structural integrity that protects your investment.
Window caulking typically lasts 5-10 years, depending on several factors:
Watch for these warning signs that indicate recaulking time:
Proper caulking serves as preventive maintenance, extending the lifespan of windows while maintaining their appearance and operational efficiency.
Preparation determines the success of your exterior window caulking project. Skip these steps, and even premium caulk won't adhere properly or survive seasonal weather changes. A systematic approach to window preparation ensures professional results and maximum protection against the elements.
Removing all traces of old caulk is essential before applying new material. New caulk won't bond to old caulk, and the deteriorating material will continue pulling away, taking your fresh application with it.
Effective tools for caulk removal include:
|
Tool |
Best Used For |
Notes |
|---|---|---|
|
Utility knife |
Cutting and scoring stubborn caulk |
Cut along both sides of the old caulk bead |
|
Putty knife |
Prying away loose material |
Works best for already deteriorating caulk |
|
Caulk removal tool |
Targeted extraction |
Specially designed for this purpose |
|
5-in-1 painter's tool |
Scraping and peeling |
Versatile option for various surfaces |
Score both sides of the old caulk where it meets the window and adjacent surface, then peel it back "like shucking a corn husk". For stubborn areas, specialized caulk removers like Lift Off can soften old material after 3-4 minutes of application.
Pro Tip: A multi-tool works efficiently for removing old exterior window caulk from hard-to-reach areas or particularly stubborn applications.
Thorough cleaning ensures proper adhesion once old caulk is removed. New caulk won't bond effectively to dirty, dusty, or contaminated surfaces.
Use a brush to remove loose particles and debris from the window frame area. Then wipe down the surface with:
Allow the area to dry completely before proceeding. Moisture trapped beneath new caulk prevents proper adhesion and promotes mold growth. Check for existing mold—if you discover black or green spots, treat with a mold-killing solution prior to caulking.
Examine your window frames for issues that require attention beyond simple caulking. Look for:
For gaps wider than ¼ inch, standard caulk alone won't work. These larger openings require a foam backer rod inserted first, providing support for the caulk layer. The backer rod prevents caulk from sagging out of the gap and creates a proper foundation for an effective seal.
"Caulk is intended for use on relatively narrow seams, typically ¼-inch wide or tighter," notes product experts. Attempting to fill large voids with caulk alone results in an unsightly, ineffective application.
Painter's tape transforms amateur caulking into professional-looking results. This technique creates precise lines while protecting surrounding surfaces from excess material.
Apply strips of painter's tape along both edges of the seam, approximately ⅛-inch away from where the caulk will be applied. This creates a perfect guide for your caulk bead.
Remove the tape immediately after applying and smoothing your caulk bead while the material is still wet. Waiting until the caulk dries often results in jagged edges when the tape is pulled away.
Pro Tip: When taping around windows for caulking, leave a dime-sized space between the tape and the wall—this provides just enough room for your caulk bead while maintaining clean lines.
"Proper preparation ensures that the caulking adheres well and provides an effective seal against air and water". The time invested in thorough preparation directly affects the durability and effectiveness of your exterior window caulk.
The materials you select for exterior window caulking determine both how easy the application will be and how long your work will last. Quality caulk and proper tools make the difference between a professional result and a project you'll need to redo in a few seasons.
Different caulk types work better for specific applications and weather conditions:
|
Caulk Type |
Best For |
Pros |
Cons |
|---|---|---|---|
|
Silicone |
Exterior windows, weatherproofing |
Excellent durability, water-resistant, flexible after curing, UV-resistant |
Difficult to work with, typically won't take paint, harder to remove |
|
Acrylic Latex |
Interior trim, moderate conditions |
Paintable, easy cleanup with water, and affordable |
Less durable in extreme weather, shrinks while curing |
|
Silicone-Latex Blend |
All-purpose window sealing |
Combines paintability with improved adhesion, reducing shrinking |
Not as waterproof as pure silicone |
|
Polyurethane |
Different material interfaces |
Superior adhesion, UV-resistant, impact-resistant, paintable |
Thick consistency, more expensive, potentially toxic |
For exterior windows, silicone or silicone-latex blends are the most effective options because they can withstand harsh weather conditions and temperature fluctuations.
Backer rods become essential for any gap wider than ¼ inch. These flexible foam cylinders serve multiple purposes:
Choose closed-cell backer rods for exterior windows since they won't absorb moisture. The rod should fit snugly in the gap—slightly larger than the opening when pressed into place.
Pro Tip: Your caulk bead should be approximately half as deep as it is wide—backer rods help maintain this ideal ratio.
Your caulking gun affects both precision and comfort during application. Manual guns with smooth rods offer better control than basic ratchet models. Look for these features:
For extensive projects, ergonomic models with cushioned grips reduce hand fatigue.
A caulk smoothing tool creates cleaner beads than using your finger. High-quality utility knife blades make precise cuts in caulk tube tips—cut at a 45-degree angle for optimal flow.
Keep clean rags and water nearby for immediate cleanup of water-based caulk mistakes. For silicone caulk cleanup, mineral spirits are more effective.
Pro Tip: Cut the caulk tube tip to match your desired bead width—narrower for precision work around trim, wider for larger gaps between siding and windows.
The actual application determines whether your exterior window caulking project succeeds or fails. These professional techniques create a weathertight seal that looks clean and lasts for years.
Creating the right opening in your caulk tube affects how the material flows. Cut the nozzle at a 45-degree angle using a sharp utility knife rather than the cutter on the caulking gun. Start with a small opening—approximately 10% wider than the gap you're filling—since you can always cut more but can't undo an oversized cut.
After cutting, use a small nail or pin to break the inner seal of the tube. Some contractors bevel the tip with a sanding block, which helps the nozzle fit perfectly into 90° corners.
Pro Tip: Test your cut size by squeezing a sample bead onto scrap paper before applying to your window.
Choose a dripless caulking gun with a smooth rod rather than a ratchet rod for better control. These guns have thumb releases that immediately stop caulk flow when you release the trigger, preventing messy drips.
Loading steps:
Use both hands—your dominant hand on the trigger and your supporting hand near the nozzle for stability.
Maintain a 45-60° angle between the gun and the surface while pulling (not pushing) the gun along the seam. Start at the top corner of your window and work downward, applying steady pressure to create an even bead.
For longer sections, professionals often avoid caulking corner-to-corner. Instead, they:
This technique prevents uneven application that happens when you must adjust your body position midway.
Immediately after applying each section of caulk, smooth it to ensure proper adhesion and a clean appearance. Use a caulk smoothing tool, popsicle stick, or your finger covered with a wet rag. When using your finger, regularly clean it with water to prevent buildup.
|
Smoothing Method |
Best For |
Notes |
|---|---|---|
|
Wet finger |
Water-based caulks |
Use soapy water for an easier glide |
|
Caulk tool |
Professional finish |
Creates a consistent bead shape |
|
Popsicle stick |
Tight corners |
Inexpensive and disposable |
Smooth in 6-inch sections rather than attempting the entire bead at once, which causes excess buildup.
Remove painter's tape while the caulk is still wet to create clean, sharp edges. Pull the tape away at a 45° angle from the caulk line, not toward it.
For cleanup:
Small touch-ups can be made immediately, although major fixes typically require complete removal and reapplication.
Even experienced contractors make mistakes when caulking exterior windows. These common errors can undermine your project and waste both time and money.
Applying new caulk over deteriorating material creates an ineffective seal. The old caulk continues pulling away, taking your new application with it. Caulking over moldy material traps the mold underneath, allowing it to spread unseen. Always remove old caulk completely, clean the surface with 99% rubbing alcohol, and ensure it's dry before applying fresh caulk.
Weep holes are small openings at the bottom of window frames designed to drain moisture. Blocking these drainage points traps water inside frames, causing rust, rot, and mold growth. Caulking movable window parts can seal them shut permanently. Use weatherstripping instead for movable components.
For gaps wider than ¼ inch, use backer rods first. Excess caulk creates messy applications and wastes product, while insufficient amounts leave gaps unprotected.
|
Mistake |
Consequence |
Solution |
|---|---|---|
|
Excess caulk |
Messy appearance, wasted material |
Use a steady hand, consistent pressure |
|
Too little caulk |
Ineffective sealing |
Apply a continuous bead along the seam |
Most manufacturers recommend temperatures above 45°F with low humidity during dry weather. High humidity causes joints to expand; once the moisture evaporates, caulk may pull away. Frozen uncured caulking loses its protective qualities once thawed.
Pro Tip: For winter caulking, consider using oil-based or polyurethane exterior caulk, such as OSI Quad, which can be applied year-round.
Caulking your exterior windows ranks among the most cost-effective home maintenance tasks you can perform. This project delivers energy efficiency improvements, moisture protection, and extended window lifespan while creating clean, professional-looking results.
Thorough preparation determines your project's success. Remove old material completely, clean surfaces properly, and inspect for damage before applying new caulk. Choose silicone or silicone-blend caulks for exterior applications since they withstand weather extremes better than other options.
Your application technique affects both appearance and performance. Apply steady, continuous beads, smooth immediately, and remove painter's tape while the caulk remains wet. Avoid common mistakes like caulking over old material, sealing weep holes, or working in poor weather conditions.
The techniques covered in this guide give you everything needed to tackle this essential maintenance task. Properly sealed windows protect your home from drafts, moisture, and energy loss while maintaining their appearance for years to come.
GET THE ESSENCE OF RELEVANT HOME
IMPROVEMENT TOPICS IN LESS THAN 5 MINUTES

Drywall Crack Repair: Causes, Fixes, and Prevention Tips
Drywall cracks appear in nearly every home at some point, whether they show up suddenly after a s...

Drywall repair costs vary dramatically depending on the damage extent and who does the work. Smal...

Thanks for joining our homeowners’ community.
Stay tuned!
Choose the category
Choose the category