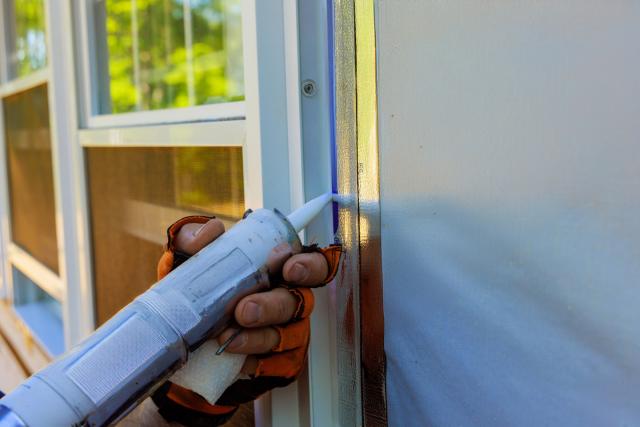
How to Caulk Windows Like a Pro: Step-by-Step Exterior an...
Leaky windows allow 25%-30% of your home's heat to escape, making exterior window caulking one of...

Drywall repair costs vary dramatically depending on the damage extent and who does the work. Small holes might cost you $10-$50 as a DIY project, while extensive water damage can reach $1,200-$2,500 when professionally repaired. Nail holes, settlement cracks, and water damage all require prompt attention to prevent further deterioration and maintain your home's value. Unrepaired drywall damage can lead to structural problems, reduce insulation efficiency, and create health hazards when mold develops behind walls. Most drywall repairs are manageable DIY projects with the right tools and techniques. This guide covers identifying different damage types, gathering the materials you'll need, executing proper repairs, and deciding when to call a professional. You'll also learn specific costs for both DIY repairs and professional services to help you choose the most cost-effective approach for your situation.
Drywall damage appears in several distinct forms throughout homes, each requiring different repair approaches and affecting your total repair costs. Identifying the damage type correctly helps you address the underlying cause rather than just covering up visible symptoms.
Daily life creates various dents and punctures in drywall. Door handles, furniture moves, and picture hanging accidents produce minor damage ranging from tiny nail holes to fist-sized openings.
Doorknob impacts create distinctive circular dents, while picture hooks leave small pinhole damage with minimal structural impact. These minor imperfections rarely compromise drywall integrity but can hurt your home's appearance.
|
Damage Size |
Typical Cause |
Repair Method |
DIY Cost |
|---|---|---|---|
|
Pinhole (<1/4") |
Nails, tacks, screws |
Spackling compound |
$5-$15 |
|
Small (1/4"-2") |
Doorknobs, furniture |
Patching compound |
$15-$30 |
|
Medium (2"-6") |
Accidents, minor impacts |
Mesh patch + compound |
$25-$50 |
Pro Tip: For frequently damaged areas like behind doors, consider installing door stops or wall guards to prevent recurring drywall repairs.
Cracks develop gradually, unlike impact damage. Hairline cracks often appear above doorways or windows, indicating normal house settling. These thin lines start harmless but can expand over time if underlying structural issues go unaddressed.
Horizontal cracks near ceilings frequently result from thermal expansion or truss uplift, particularly in homes with significant temperature fluctuations. Vertical cracks usually pose less concern unless they widen beyond 1/8 inch.
Stair-step cracks following mortar lines deserve immediate attention as they potentially signal foundation problems. Addressing these promptly saves considerably on future repair costs for both drywall and underlying structural issues.
Water-damaged drywall shows distinctive symptoms, including discoloration, bubbling paint, and softening material. Brown or yellow staining typically appears first, followed by texture changes as the gypsum core deteriorates.
Ceiling water damage often reveals itself through sagging sections, while wall damage may remain less obvious until advanced stages. Even minor leaks can create significant damage if left unchecked over time.
Mold development accompanies most water damage, beginning approximately 24-48 hours after moisture exposure. Beyond unsightly black or green spots, mold creates health hazards, including respiratory issues and allergic reactions. Water-damaged drywall generally requires removal rather than surface treatment, particularly when mold is present.
The severity of water damage directly impacts repair costs, with extensive damage potentially requiring complete section replacement plus addressing the underlying moisture source.
Successful drywall repair depends on having the right tools and materials before you start. Gathering everything you need upfront saves time and helps ensure quality results. The specific tools vary based on damage type, but a core set of materials works for most drywall repair projects.
Joint compound (also called mud) forms the foundation of most drywall repairs. The right materials and tools make the difference between amateur-looking patches and seamless repairs that blend with your existing walls.
|
Material |
Purpose |
Cost Range |
Notes |
|---|---|---|---|
|
All-purpose joint compound |
Filling holes, seams |
$15-$25 |
Pre-mixed saves time |
|
Setting-type compound |
Faster drying repairs |
$12-$18 |
Powder form, mix as needed |
|
Drywall tape |
Reinforcing joints |
$4-$10 |
Paper or mesh options |
|
Fine-grit sandpaper (120-220) |
Smoothing dried compound |
$5-$15 |
Sanding blocks ease application |
|
Primer |
Sealing repairs |
$20-$30 |
Essential for paint adhesion |
|
Paint |
Matching existing walls |
$25-$40 |
Bring a sample for color matching |
For small holes (under 2"), you'll need:
Medium to large repairs additionally require:
Water damage repairs specifically call for:
Pro Tip: Consider a drywall repair kit ($15-$25) for occasional small repairs. These kits include pre-cut patches, compound, and application tools—saving you from buying full-sized materials for minor fixes.
The total cost of tools and materials ranges from $75-$150 for first-time DIY repairs, though many tools remain reusable for future projects. Specialty tools like corner trowels improve results but aren't necessary for basic repairs.
Measure the damaged area accurately and add 20% extra compound to account for waste and mistakes. For water damage repairs, consider renting specialized equipment, such as moisture meters, if this is a one-time project.
Drywall repairs follow different approaches based on hole size and damage type. Each method requires specific techniques to achieve results that blend seamlessly with your existing walls. The repair complexity directly impacts material costs and time investment.
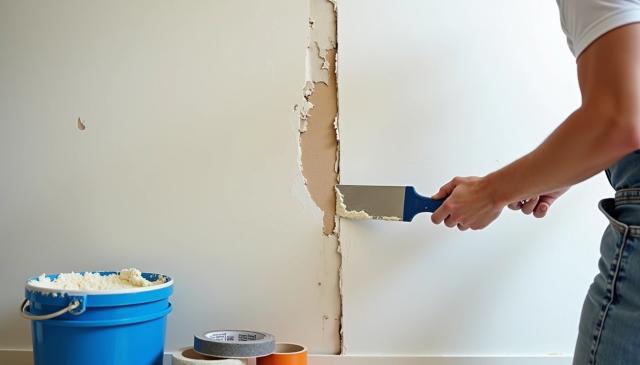
Small holes under 2 inches require the most basic repair approach:
|
Hole Size |
DIY Cost |
Professional Cost |
|---|---|---|
|
Nail holes |
$5-$10 |
$75-$150 |
|
1-2 inches |
$15-$25 |
$100-$200 |
Pro Tip: For multiple small holes, use a sanding sponge rather than sandpaper—it conforms better to wall contours and creates smoother transitions between the repair and existing wall.
Damage exceeding 6 inches requires section replacement:
Large section repairs cost $50-$100 for DIY projects, while professional services charge $200-$400, depending on accessibility and complexity.
Water damage requires special attention due to structural and health concerns:
Water damage ceiling repairs cost $35-$55 per square foot professionally due to extensive work requirements. DIY repairs require $75-$150 in materials plus potential equipment rentals.
Ceiling repairs often require assistance due to awkward positioning and safety concerns. Addressing water damage promptly prevents more expensive structural problems later.
Drywall repair costs depend on the extent of damage, the repair method, and who performs the work. Understanding these cost factors helps you budget appropriately and decide between DIY approaches or hiring professionals. Here's what you can expect to pay for different repair scenarios.
DIY drywall repairs typically cost between $10-$250, depending on the extent of damage and materials required. Your primary expenses include:
|
Item |
Cost Range |
Notes |
|---|---|---|
|
Joint compound |
$15-$25 |
Covers multiple small repairs |
|
Mesh patches |
$5-$15 |
For holes 2-6 inches |
|
Replacement drywall |
$10-$20 per sheet |
For larger damage areas |
|
Primer and paint |
$25-$45 |
Often overlooked in budgeting |
|
Specialized tools |
$30-$75 |
One-time investment for multiple projects |
The total material cost for repairing a single 4-inch hole runs around $30-$50, whereas fixing a water-damaged 4×8-foot section might reach $150-$200 in materials alone.
Pro Tip: Purchase slightly more materials than you think you'll need—approximately 20% extra. This prevents mid-project store runs and accounts for mistakes during your first few repairs.
Professional drywall repair services charge either by square footage or by project type, depending on the complexity:
|
Repair Type |
Average Cost Range |
Pricing Method |
|---|---|---|
|
Nail holes/small dents |
$75-$150 |
Flat rate per repair |
|
Medium holes (2-6") |
$100-$275 |
Per hole or area |
|
Large holes (6"+) |
$150-$400 |
Per hole or sq ft |
|
Water damage |
$275-$785 |
Per sq ft ($35-$55) |
|
Ceiling repairs |
$300-$850 |
15-20% premium over walls |
|
Texturing/finishing |
$100-$300 |
Added to the base repair cost |
Labor costs account for approximately 65-75% of professional pricing. Compared to DIY approaches, hiring professionals costs 3-5 times more but typically reduces repair time by 70-80% and provides quality results.
Price variations occur based on geographic location, with metropolitan areas charging 10-30% more than rural regions. Contractors often set minimum service charges of $150-$200 regardless of the repair size, making it cost-effective to bundle multiple small repairs into a single service call.
Preventing drywall damage costs far less than repeated repairs. Smart prevention measures help you avoid costly damage down the road. Proper installation techniques and routine maintenance can extend your drywall's lifespan, while also maintaining your home's appearance and value.
Quality drywall installation prevents many common problems. Make sure studs are straight and properly spaced—16 to 24 inches on center works best. Use the correct screw length and spacing, typically 12 inches apart along studs and 8 inches along ceiling joists.
|
Prevention Measure |
Initial Cost |
Potential Repair Savings |
|---|---|---|
|
Moisture-resistant drywall in bathrooms/kitchens |
$2-$3 more per sheet |
$400-$800 per incident |
|
Corner bead installation on exposed corners |
$1-$2 per linear foot |
$100-$200 per corner repair |
|
Proper screw placement and depth |
No added cost |
$150-$300 in cracking prevention |
|
Wall anchors for heavy items |
$5-$15 per pack |
$75-$150 per hole repair |
Joint sealing requires three thin coats of compound rather than one thick application. Allow each layer to dry completely before applying the next. Install corner beads on all exposed corners to prevent edge damage from furniture and daily impacts.
Pro Tip: Use heavy-duty wall anchors even in rooms without children—they provide better support for hanging items and prevent drywall damage over time.
Water damage creates the most expensive drywall repairs, so effective moisture control matters. Maintain relative humidity between 30-50% throughout your home. Use dehumidifiers in damp areas like basements and bathrooms.
Check plumbing fixtures monthly for slow leaks that might go unnoticed. Establish a seasonal inspection routine:
Water-resistant primer in bathrooms and kitchens creates an additional moisture barrier. This adds $20-$30 per gallon to your project cost but can save hundreds in water damage repairs.
Address small issues immediately—hairline cracks can be sealed with flexible caulk before they expand into larger problems requiring extensive repairs.
Choosing between DIY and professional drywall repair depends on the extent of damage, your skill level, and budget considerations. The right choice varies depending on the project's complexity and safety requirements.
Professional help becomes necessary for specific situations:
|
Scenario |
Why Professional Help is Needed |
|---|---|
|
Water damage with potential mold |
Health risks and proper remediation are required |
|
Structural damage affecting multiple walls |
Expertise needed for proper alignment |
|
Ceiling repairs above 8 feet |
Safety concerns and specialized equipment |
|
Time-sensitive repairs |
Faster completion with professional teams |
Always consult professionals for repairs involving electrical components, load-bearing walls, or extensive water damage to avoid safety hazards.
DIY Approach:
Professional Service:
Consider a hybrid approach for borderline cases—have professionals handle structural repair work while you manage finishing tasks like sanding and painting to reduce overall costs.
Drywall repair becomes manageable once you understand the damage type, the necessary tools, and the proper techniques. Whether you're dealing with small nail holes or extensive water damage, addressing issues promptly prevents further deterioration and costly repairs later. Knowing when to tackle a project yourself versus calling professionals saves both time and money.
Small repairs make excellent DIY weekend projects for budget-conscious homeowners. Professional services offer expertise and efficiency at higher rates but remain worthwhile for complex issues like ceiling repairs or potential mold situations.
Prevention costs far less than repair. Regular home inspections, proper moisture control, and appropriate wall anchors extend your drywall's lifespan significantly. Address small imperfections before they develop into major problems requiring extensive work.
You can now confidently assess damage, gather the right materials, and execute repairs that maintain your home's appearance and value. Drywall repair transforms from a daunting challenge into straightforward home maintenance with the right approach.
GET THE ESSENCE OF RELEVANT HOME
IMPROVEMENT TOPICS IN LESS THAN 5 MINUTES

How to Caulk Windows Like a Pro: Step-by-Step Exterior an...
Leaky windows allow 25%-30% of your home's heat to escape, making exterior window caulking one of...

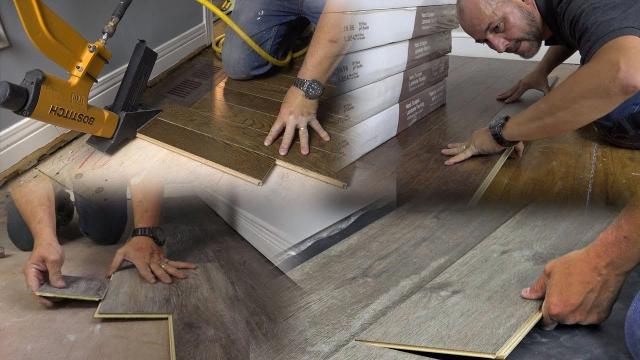
Vinyl flooring has been a popular choice for homes since 1933. Sheet vinyl flooring installation...

Thanks for joining our homeowners’ community.
Stay tuned!
Choose the category
Choose the category