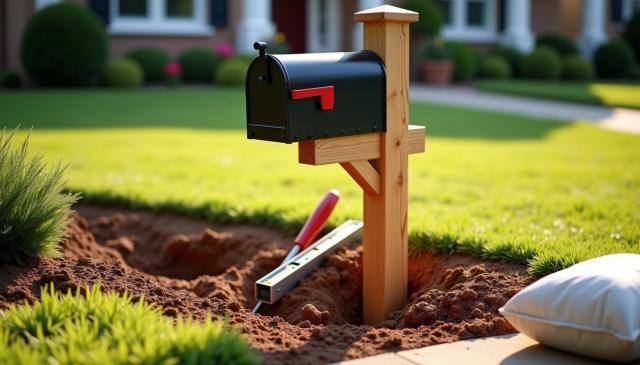
Mailbox Installation Made Simple: Step‑by‑Step DIY Guide
A properly installed mailbox post can last over 20 years, while a poorly installed one might need...

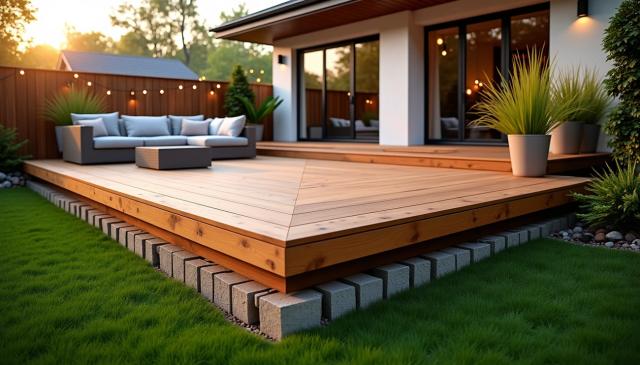
Floating decks sit directly on the ground without permanent footings or foundations, making them accessible weekend projects for homeowners with basic carpentry skills. These structures offer flexibility for different yard sizes and budgets, with countless design options to match your specific needs. Most floating decks avoid permit requirements since they stay close to ground level and don't attach to existing structures. You can complete this project in approximately two days using $500-1,500 in materials, depending on your chosen size and lumber type. The appeal of floating decks lies in their simplicity compared to traditional deck construction. While conventional decks require extensive excavation and permanent foundations, floating decks rest on concrete blocks placed on level ground. This approach eliminates complex foundation work while still providing a stable, attractive outdoor platform. Let's explore how to build your own floating deck from planning through completion.
Floating decks provide an excellent entry point into deck construction without the complexity of traditional building methods. These structures rest on concrete blocks placed directly on ground level rather than being anchored to permanent foundations or attached to existing buildings.
Traditional decks require significant foundation work and structural connections that floating decks avoid entirely. Here's how the two approaches differ:
|
Feature |
Traditional Deck |
Floating Deck |
|---|---|---|
|
Foundation |
Deep concrete footings below the frost line |
Concrete blocks resting on the ground or gravel |
|
Attachment |
Connected to the house structure |
Freestanding, not attached to buildings |
|
Height |
Can be built at various elevations |
Usually limited to 16-30 inches above ground |
|
Permits |
Almost always required |
Often exempt if under height limits (typically 30 inches) |
|
Cost |
$30-60 per square foot |
$15-30 per square foot |
|
Construction complexity |
Requires advanced skills |
Manageable for beginners |
Floating decks distribute weight across multiple concrete blocks placed on compacted soil or gravel beds. This approach works well for relatively level ground, but becomes problematic on steep slopes where traditional footings perform better.
Pro Tip: Check local building codes before starting your project. Most areas exempt floating decks under 30 inches in height from permit requirements, but regulations vary by municipality.
Several factors make floating decks particularly suitable for first-time builders and temporary living situations:
Construction advantages:
Renters benefit significantly from floating decks because these structures can be disassembled and moved. Traditional decks become permanent property improvements that renters cannot take when relocating. Many landlords approve floating decks more readily since they don't permanently alter the property.
The temporary nature of floating decks typically means they won't affect property tax assessments. This creates economic advantages for budget-conscious homeowners and renters seeking outdoor space improvements without long-term financial implications.
Properly constructed floating decks last 15-20 years with regular maintenance—comparable to traditional decks but requiring significantly less initial investment in time and materials. Modern concrete deck blocks include notched designs that secure beams and joists effectively, providing structural stability despite the absence of permanent foundations.
Planning your floating deck layout requires careful consideration before starting construction. The design phase determines your project's success and helps you avoid costly mistakes during the build process.
The right floating deck balances your available yard space with your intended use. Measure your area carefully, noting obstacles like trees, utility lines, or property boundaries that affect your design.
|
Deck Shape |
Best For |
Typical Sizes |
Complexity |
|---|---|---|---|
|
Rectangle |
Most versatile, maximizes space |
8'×10' to 12'×24' |
Low |
|
Square |
Intimate gathering areas |
8'×8' to 12'×12' |
Low |
|
L-Shape |
Wrapping around house corners |
Varies by corner dimensions |
Medium |
|
Circular |
Focal points, fire pit surrounds |
8' to 12' diameter |
High |
|
Multi-level |
Sloped yards, visual interest |
Varies by design |
High |
Beginners should start with rectangular or square designs under 200 square feet. An 8'×10' deck accommodates a small dining table with four chairs, while a 12'×12' deck allows for larger furniture arrangements or additional features.
Consider joist spacing when planning your deck size. Standard 16-inch spacing provides good stability, while 12-inch spacing adds extra strength for heavy-use areas. Avoid 24-inch spacing for high-traffic decks, as this can create bounce and instability.
Best for beginners: Rectangular decks between 8'×10' and 10'×12' offer the perfect balance of manageable construction and useful space.
Your deck's position affects comfort and usability throughout the day. Track sun patterns in your yard over several days, noting these key times:
South-facing decks receive maximum sunlight year-round, while north-facing areas stay mostly shaded. East-facing decks catch gentle morning sun, and west-facing locations endure intense afternoon heat.
Proper drainage extends your deck's lifespan and prevents water damage. Your site needs a slight slope of approximately ¼ inch per foot away from buildings. Leave ½-inch gaps between decking boards to allow water drainage.
Deck blocks should sit on 2-3 inches of compacted gravel rather than directly on soil. This prevents shifting from freeze-thaw cycles and improves drainage under your structure.
Several digital resources help you visualize your project before purchasing materials:
These tools let you experiment with different dimensions, railing options, and stair configurations. Export your final design as a reference during construction.
Graph paper works well for simple designs—use each square to represent one foot for accurate sketching and material calculations.
Account for local building codes during planning. While floating decks typically avoid permit requirements, height restrictions (usually 30 inches maximum) and property line setbacks still apply in most areas.
Plan for future additions like built-in benches, planters, or pergolas, even if you won't build them immediately. Including these elements in your initial design prevents structural modifications later.
Proper preparation prevents frustrating mid-project hardware store runs. Having the right tools and materials organized before you start makes the difference between a smooth weekend build and a drawn-out struggle.
You can complete most floating deck projects with basic carpentry tools. Most homeowners already own several of these items, making the remaining tool investment minimal.
|
Tool |
Purpose |
|---|---|
|
Circular saw |
Cutting lumber to length |
|
Drill/driver |
Driving screws and creating pilot holes |
|
Level (2' and 4') |
Ensuring blocks and framing are level |
|
Speed square |
Marking 90° angles and checking corners |
|
Tape measure (25'+) |
Measuring lumber and spacing |
|
Shovel |
Preparing the ground and leveling |
|
String line |
Creating straight reference lines |
|
Hammer |
General assembly and adjustments |
|
Chalk line |
Marking straight lines across distances |
Consider renting specialized equipment like post-hole diggers or concrete mixers rather than purchasing them for single-use projects.
Your lumber choice affects appearance, maintenance needs, and project longevity. Each option offers different benefits depending on your priorities.
|
Lumber Type |
Cost/Sq Ft |
Lifespan |
Best For |
|---|---|---|---|
|
Pressure-treated pine |
$2-$5 |
15-20 years |
Budget-conscious builds |
|
Cedar/redwood |
$4-$9 |
15-25 years |
Natural appearance, no chemicals |
|
Composite |
$7-$12 |
25-30+ years |
Maintenance-free, splinter-free |
|
Tropical hardwood |
$8-$15 |
25+ years |
Premium appearance, durability |
Standard floating deck construction requires:
Choose pressure-treated lumber rated for "ground contact" when components will be near soil.
Quality hardware ensures your deck remains stable and durable over time. Invest in corrosion-resistant materials to prevent premature failure.
|
Item |
Quantity Needed |
Purpose |
|---|---|---|
|
Deck blocks |
1 per 4-6 ft² |
Foundation support |
|
3" deck screws |
~1 lb per 100 ft² |
Attaching decking to the frame |
|
Joist hangers |
2 per joist |
Connecting joists to beams |
|
Corner brackets |
4+ |
Reinforcing frame corners |
|
Galvanized nails |
1-2 lbs |
General construction |
|
Landscape fabric |
Deck footprint |
Weed prevention under the deck |
Use galvanized or stainless steel fasteners exclusively. Coastal areas require stainless steel hardware since salt air rapidly corrodes standard materials.
Additional materials include gravel for drainage, waterproof sealant, and finishing products like deck stain or paint for protection and appearance.
The construction process breaks down into five phases that most homeowners can complete over a weekend. Each step builds on the previous work, creating a stable foundation for your floating deck.
Clear grass, weeds, and rocks from your marked deck area. The ground needs rough leveling with a slight slope of ¼ inch per foot away from buildings for proper drainage. Mark your deck perimeter using string lines and stakes according to your design plan.
Lay landscape fabric over the cleared area to prevent weed growth under your finished deck.
Position concrete deck blocks at each corner and at regular intervals based on your deck size. Dig shallow depressions for each block, adding 2-3 inches of gravel underneath for drainage. Level each block individually, then check that all blocks align with each other using a long level or string line.
|
Block Spacing |
Max Beam Size |
Deck Load Capacity |
|---|---|---|
|
4 feet apart |
2×6 |
Standard residential |
|
6 feet apart |
2×8 |
Light use only |
|
8 feet apart |
2×10 |
Not recommended |
Construct your outer frame using 2×8 or 2×10 pressure-treated lumber. Connect corners with galvanized corner brackets for strength. Check that your frame is perfectly square by measuring diagonally from corner to corner—both measurements must be identical.
Secure the completed frame to the deck blocks using the built-in notches designed for this purpose.
Install interior joists 16 inches on center (measured from the center of one joist to the center of the next). Attach joists to the rim board using joist hangers. Larger decks require support beams perpendicular to joists at 6-8 foot intervals.
Check that all joists remain level across their length. Add shims under deck blocks if any have shifted during frame construction.
Place decking boards perpendicular to the joists, leaving ¼-inch gaps between boards for drainage and ⅛-inch gaps at the ends for expansion. Secure each board with two deck screws at every joist crossing.
Start with boards at opposite ends, then work toward the center, checking periodically that edges stay aligned. Trim any overhanging boards with a circular saw for clean, finished edges.
Once you complete the structural components, your floating deck needs finishing touches that improve both appearance and safety. These final steps transform a basic platform into a polished outdoor space while protecting users.
Sand all exposed edges and corners using 80-grit sandpaper, followed by 120-grit for a smooth finish. Focus on decking board ends and areas where splinters might develop. A palm sander speeds this process for larger decks.
|
Sandpaper Grit |
Purpose |
Areas to Focus |
|---|---|---|
|
60-80 |
Remove rough spots |
Cut ends, visible edges |
|
120 |
Create a smooth finish |
All sanded areas |
|
220 |
Optional fine finish |
Handrails, seating areas |
Decks over 24 inches in height require railings for safety. Standard railing height should be 36 inches minimum, with balusters spaced less than 4 inches apart to prevent small children from slipping through.
Steps require specific dimensions for safety: a maximum riser height of 7.75 inches and a minimum tread depth of 10 inches. Each step should maintain identical measurements to prevent tripping hazards.
Conduct a thorough inspection before use:
Establish a semi-annual inspection routine to maintain your deck's safety and extend its lifespan.
Building a floating deck provides an accessible entry point into outdoor construction while adding functional space to your property. These freestanding structures offer homeowners a practical weekend project that avoids the complexity and expense of traditional deck construction.
Proper planning determines your project's success. Choosing appropriate dimensions, considering sun exposure and drainage patterns, and selecting quality materials prevents costly mistakes during construction. The five-phase build process—ground preparation, block placement, frame construction, joist installation, and decking—breaks the project into manageable steps.
Your completed floating deck serves multiple purposes beyond basic outdoor space. The structure typically returns most of its construction cost in added home value while providing years of functional use. Regular maintenance and safety inspections ensure your deck remains stable and attractive over its 15-20 year lifespan.
Floating decks work particularly well for homeowners seeking temporary or semi-permanent solutions. You can modify, expand, or relocate these structures as your needs change, making them ideal for evolving outdoor spaces.
The satisfaction of completing this project extends beyond the finished product. You'll have developed practical carpentry skills while creating a custom outdoor area designed specifically for your space and needs. With proper care, your floating deck will provide years of reliable service and serve as a foundation for future outdoor improvements.
Transform your backyard into an outdoor oasis with these essential insights for building your first DIY floating deck project.
This accessible project offers renters and homeowners alike the perfect entry point into outdoor construction while creating valuable living space that can be customized and expanded over time.
GET THE ESSENCE OF RELEVANT HOME
IMPROVEMENT TOPICS IN LESS THAN 5 MINUTES

Mailbox Installation Made Simple: Step‑by‑Step DIY Guide
A properly installed mailbox post can last over 20 years, while a poorly installed one might need...

Modifying the wrong wall during renovations can cost homeowners between $10,000 and $100,000 in s...

Thanks for joining our homeowners’ community.
Stay tuned!
Choose the category
Choose the category