How to Tell if Your Wall is Load-Bearing: Essential Signs...
Modifying the wrong wall during renovations can cost homeowners between $10,000 and $100,000 in s...

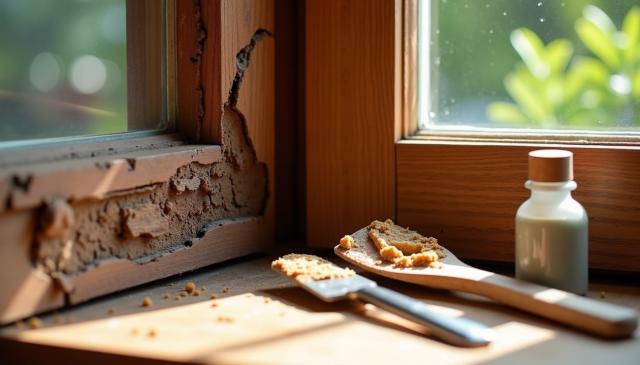
Wood rot poses a serious threat to your home's structural integrity, affecting both safety and appearance. Window sills and door frames face the highest risk due to constant exposure to moisture and weather elements. Early detection makes wood rot repair an affordable DIY project you can handle yourself. The longer damaged wood stays wet, the more extensive the deterioration becomes. Taking immediate action when you discover rot prevents the problem from spreading to other areas. You don't need to replace every piece of rotted wood completely. Two-step repair kits with wood hardeners can effectively seal and reinforce weakened wood fibers. Epoxy products restore damaged sections by creating strong bonds with the remaining solid wood. When you catch rot early, proper preparation and patching techniques can successfully restore the damaged areas.
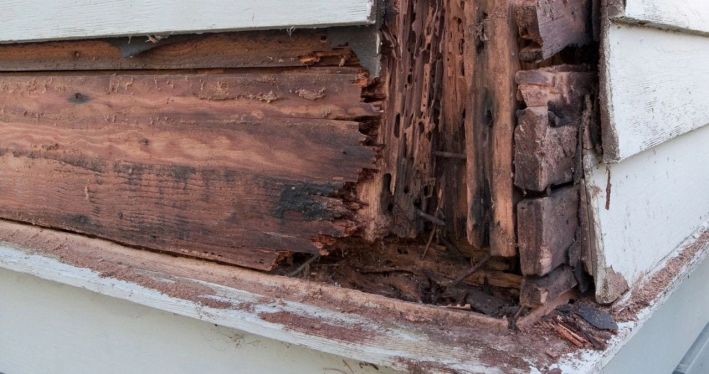
Catching wood rot before it spreads can save you thousands in repair costs. Identifying early signs of decay allows you to address small problems before they become major structural issues. Rot fungi break down wood cellulose and lignin through prolonged moisture exposure, unlike termites, which physically consume the wood.
Visual inspection serves as your first defense against wood rot. Look for these key indicators:
The "press test" confirms your suspicions quickly. Press a screwdriver against suspect areas—if it penetrates easily with little resistance, you've found rot. A musty, earthy, or mushroom-like smell often accompanies wood rot, particularly in enclosed spaces.
Pro Tip: Run your hand over wooden surfaces while inspecting them visually. Your sense of touch can detect subtle softness or texture changes that might escape visual detection.
Focus your inspection efforts on moisture-prone areas:
|
Location |
Why It's Vulnerable |
What to Look For |
|
Window frames & sills |
Water accumulation from rain and condensation |
Softness, discoloration, peeling paint |
|
Exterior doors & thresholds |
Exposure to weather and ground moisture |
Sponginess, warping, and difficulty opening |
|
Bathrooms & kitchens |
Plumbing leaks, high humidity |
Soft floors around toilets, under sinks |
|
Basement & crawlspaces |
Ground moisture, poor ventilation |
Soft support beams, discoloration on joists |
|
Attic & roof areas |
Roof leaks, poor ventilation |
Discolored roof decking, sagging areas |
|
Decks & exterior trim |
Direct weather exposure |
Soft boards, visible fungal growth |
|
Where wood meets concrete |
Moisture wicking from the foundation |
Darkened wood, softness at contact points |
Homes in humid climates need inspection twice yearly, while those in drier regions require annual checks. After heavy storms or plumbing problems, inspect potentially affected areas immediately.
Several tools can improve your wood rot detection beyond basic visual inspection:
Basic tools:
Specialized tools:
Look beyond obvious water damage during inspections. Minor discoloration or slight softness can indicate early-stage wood rot, making timely repair possible before structural integrity becomes compromised.

Repairing rotted wood works well under these conditions:
Before attempting repairs, fix the moisture source first. Otherwise, any repairs you make will quickly become undone as new rot develops in the treated area.
For successful wood rot repair, follow this process:
Specialized wood repair kits containing hardeners and epoxy compounds can effectively restore rotted wood without full replacement for minor damage.
Replacement becomes the better option when:
|
Replace When |
Explanation |
|
Rot affects 30% or more of the wood |
Extensive damage compromises overall integrity |
|
Wood crumbles easily or feels soft |
Core strength is already lost |
|
Rot appears near critical joints |
Weakens connection points |
|
Previous repairs have failed |
Recurring issues indicate deeper problems |
|
Damage extends throughout the piece |
Overall, integrity is compromised |
Delaying wood replacement only increases repair costs over time. As one expert states: "If you do only a half-hearted job of resolving the effects of wood damage, you are simply creating a ticking time bomb".
Repair might seem like the more economical option initially. However, for severely damaged wood, replacement often proves more cost-effective in the long term, as repeated repairs can become expensive.
Whether the rotted wood serves a structural purpose changes your approach completely:
Structural elements include:
Even minor rot in these areas can compromise your home's safety. When the weight loss in wood from decay reaches just 10%, the loss of mechanical properties may exceed 50%. This makes replacement the safer choice for structural components.
Non-structural elements include:
For these components, repair is often appropriate since they don't bear loads. Non-structural elements protect the frame but don't support it.
Cost also matters. Replacing a damaged 4x4 or 6x6 post might cost less than $200, but custom columns or historical wood features could be prohibitively expensive to replace, making thorough repair the more practical option.
Safety should be your primary consideration. For structural elements, even small areas of rot might justify replacement, whereas cosmetic elements can typically be repaired successfully as long as the source of moisture has been eliminated.
Getting the right tools and materials before you start your wood rot repair saves time and prevents mid-project frustration. Each phase of the repair process requires specific equipment, from removing damaged wood to applying fillers and protective finishes.
Complete removal of damaged wood forms the foundation of any successful repair. You'll need these essential tools:
|
Tool |
Purpose |
Best For |
|
Putty knife |
Removing loose material and applying fillers |
Surface-level damage |
|
Wood chisel |
Precisely cutting out rotted sections |
Moderate to deep rot |
|
Wire brush |
Cleaning surface debris and loose fibers |
Preparation before treatment |
|
Sanding block/Orbital sander |
Smoothing repaired surfaces |
Final finishing |
Start with coarse-grit sandpaper (80-120 grit) to remove damaged areas, then move to finer grits (220+ grit) for finishing work. A screwdriver or awl helps you probe suspect areas to determine how extensive the damage really is.
Pro Tip: When sanding repaired areas, begin with 120-grit sandpaper and gradually work your way to 220-grit for a professional finish that accepts paint smoothly.
Specialized repair products make the difference between temporary fixes and lasting repairs:
Wood hardeners penetrate deeply into deteriorated wood, binding the remaining fibers together to create a solid foundation. These low-viscosity liquids strengthen compromised wood and prevent further decay. Apply the hardener until the wood surface looks shiny, which indicates full saturation.
Complete epoxy repair systems typically include:
Systems like the EndRot System or PC Products Rotted Wood Repair Kit contain everything you need for typical window or door repairs. Most kits include gloves, mixing tools, and application accessories.
Safety equipment protects you throughout the repair process:
Always work in well-ventilated areas, especially when using epoxy products or wood hardeners. Read manufacturer instructions carefully for mixing ratios and working times. Some products cure quickly, giving you limited time to apply and shape the material.
Choose disposable tools for small, one-time repairs. For larger projects or multiple repairs, invest in quality reusable tools that will serve you better over time.
Repairing rotted wood requires patience and attention to detail for lasting results. Each step builds on the previous one, creating repairs that strengthen damaged wood rather than just covering the problem. This approach works for window sills, door frames, and most other wooden components around your home.
Start by completely removing all compromised material. Use a chisel or a wire brush to scrape away soft, crumbly wood until you reach solid, healthy material. The excavated area doesn't need perfect smoothness—just ensure all deteriorated wood is gone. For precision work, a router with a V-shaped bit helps remove rot in hard-to-reach areas, keeping the bit about 1/8 inch from the wood's back edge.
Pro Tip: Drill small holes into severely damaged areas to allow better penetration of treatment products in the next steps.
Apply fungicide to kill remaining rot spores after removing damaged wood. Spray or brush the product generously, extending several inches beyond the visible damage to prevent future spread. Most fungicides need 2-4 hours of drying time, depending on temperature and humidity. Don't rush this step—complete drying prevents trapping moisture that causes future problems.
Apply wood hardener to strengthen remaining wood fibers once the fungicide dries. This liquid penetrates deeply, reinforcing weak areas and creating a solid foundation for filler. Apply multiple coats until the wood appears shiny and fully saturated. For larger repairs, drill small holes and inject hardener directly for better penetration. Allow drying according to manufacturer instructions—typically 2-4 hours.
|
Filler Type |
Best For |
Working Time |
Advantages |
|
Epoxy |
Structural repairs |
10-30 minutes |
Water-resistant, strongest bond |
|
Wood Putty |
Cosmetic repairs |
30+ minutes |
Easier to shape, less expensive |
Apply your chosen filler while the hardener remains slightly tacky for maximum adhesion. For epoxy, mix equal parts (typically a 1:1 ratio) for at least two minutes to ensure proper activation. Press filler firmly into the cavity using a putty knife, slightly overfilling to allow for sanding. For vertical surfaces, apply multiple thin layers instead of one thick application to prevent sagging.
Sand the repaired area to match the surrounding wood after the filler completely cures (24 hours for most products). Start with medium-grit sandpaper (80-120) to remove excess material, then switch to finer grits (220+) for a smooth finish. For contoured surfaces, wrap sandpaper around a dowel or use flexible sanding sponges to maintain the original profile.
Protect your repair from future moisture damage with proper finishing. Apply exterior-grade primer to the sanded surface, allowing complete drying. Finish with at least two coats of high-quality exterior paint or sealer. This final step creates a visually seamless repair while providing essential protection against the elements that caused the original damage.
Prevention costs significantly less than repairing damaged wood structures. Once you complete your wood rot repair, taking proactive steps protects your investment and extends the life of wooden components throughout your home.
Moisture control serves as the foundation of effective rot prevention. Fix plumbing leaks immediately when you discover them. Address roof problems promptly and keep rain gutters clear of debris to prevent water from spilling onto wood siding. Basements and crawl spaces need proper ventilation to allow moisture to evaporate. Vapor barriers help stop ground moisture from seeping upward.
|
Prevention Method |
Frequency |
Benefit |
|
Apply water-repellent sealer |
Annually |
Creates a moisture barrier |
|
Caulk windows and doors |
When cracked |
Prevents water infiltration |
|
Paint all surfaces |
Every 5-7 years |
Seals and protects wood |
Painted and sealed wood surfaces resist rot better than untreated wood. Apply high-quality, water-repellent sealers to all exposed wood surfaces yearly. Use exterior-grade caulk to fill cracks around windows, doors, and siding joints.
Inspect your home once yearly for early signs of wood rot [19]. Check painted surfaces for peeling or cracking, which indicates potential water entry points [20]. Pay special attention to bathrooms, kitchens, and laundry areas where plumbing creates higher moisture risks [16].
Wood rot management follows a clear hierarchy that saves both time and money. Prevention through moisture control comes first, followed by regular inspections and repair when necessary. Taking immediate action when you discover rot prevents minor issues from becoming major structural problems.
The repair process requires attention to detail at each step. Complete removal of damaged wood, proper application of fungicide, thorough reinforcement with wood hardener, and careful filling create lasting results. The final protective layer of primer and paint protects your repair from future moisture damage.
Regular maintenance requires less effort than extensive repairs, making prevention your most cost-effective approach. Armed with the right tools, materials, and knowledge, you can confidently address wood rot issues before they threaten your home's structure. Remember that fungi need moisture to survive—eliminating water sources forms the foundation of both successful repairs and prevention.
GET THE ESSENCE OF RELEVANT HOME
IMPROVEMENT TOPICS IN LESS THAN 5 MINUTES

How to Tell if Your Wall is Load-Bearing: Essential Signs...
Modifying the wrong wall during renovations can cost homeowners between $10,000 and $100,000 in s...

Kitchen countertop replacement typically costs between $1,000 and $5,500 for most standard kitche...

Thanks for joining our homeowners’ community.
Stay tuned!
Choose the category
Choose the category