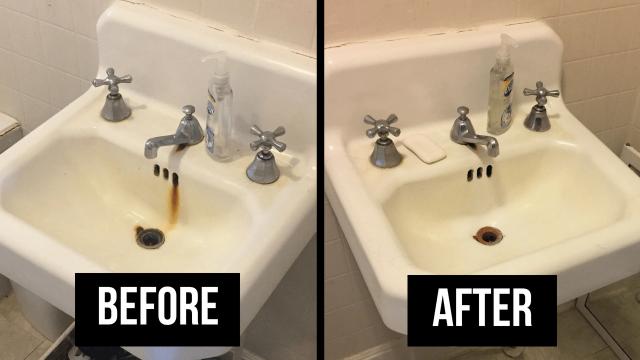
How to Remove Rust Stains from a Bathtub: Effective DIY M...
Those orange and brown rust stains in your bathtub might be frustrating, but they're completely m...

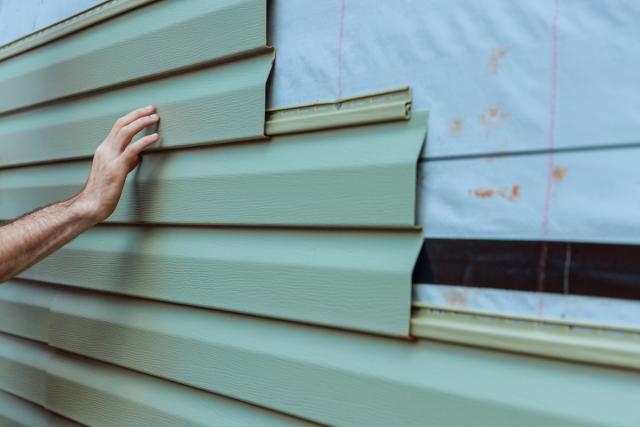
Damaged siding can decrease your property value by up to 10%, making replacement one of the most impactful home improvements you can tackle. Your home's siding does more than enhance curb appeal—it's the primary barrier protecting your house from weather, moisture, and pests. Quality siding materials can also reduce energy bills by improving your home's insulation. When choosing siding options, you'll need to balance durability, cost, and maintenance requirements to find the best fit for your specific situation. This guide covers everything you need to know about siding replacement, from identifying when it's time for new materials to installing options like vinyl, wood, and fiber cement. You'll learn professional techniques for removing old siding, preparing surfaces properly, and installing new panels with precision. Whether you're planning a DIY project or hiring contractors, these methods will help you achieve professional-quality results that protect your home for decades.
Choosing the right siding material means understanding how each option performs in terms of appearance, durability, and cost. Five main types dominate the market, each offering distinct advantages for different home styles and budgets.
Vinyl remains the most popular siding choice in North America thanks to its affordability and versatility. Modern vinyl comes in hundreds of colors and textures, including realistic wood grain patterns that fool most observers. Maintenance requirements are minimal—occasional washing with soap and water keeps it looking fresh. Quality vinyl typically lasts 20-40 years, depending on climate conditions and product grade.
The material resists fading, cracking, and pest damage while providing decent insulation value. Installation is straightforward for DIY projects, and replacement panels are readily available if damage occurs.
Wood has protected homes for centuries and continues to offer unmatched natural beauty. Cedar, pine, spruce, and redwood each bring unique characteristics—cedar resists insects naturally, while redwood weathers to an attractive silver-gray. Wood provides excellent insulation and can last 20-40 years with proper maintenance.
The trade-off comes in upkeep requirements. Wood needs staining or painting every 3-7 years to maintain protection against moisture and UV damage. Regular inspections for rot, insect damage, and loose boards are essential for longevity.
This engineered material combines cement, sand, and cellulose fibers to create siding that mimics wood without the maintenance headaches. Fiber cement resists fire, termites, rot, and harsh weather while maintaining its appearance for decades. The initial cost is higher, but the material typically lasts 50+ years with minimal upkeep.
Fiber cement comes in various textures and can be painted any color. It requires repainting only every 10-15 years and handles extreme weather conditions better than most alternatives.
Aluminum and steel siding offer exceptional durability against the elements. Aluminum resists corrosion but dents from hail or impacts, while steel provides superior strength but may rust if the protective coating gets scratched. Both types generally last over 40 years and require little maintenance beyond occasional cleaning.
Metal siding reflects heat effectively, helping reduce cooling costs in hot climates. It's also fire-resistant and won't attract insects or rodents.
Made from wood fibers and resins, engineered wood delivers the appearance of traditional wood with improved performance. It resists moisture, fungus, and insects better than natural wood while providing good insulation value. Most products come pre-primed and ready for painting, lasting 30+ years with proper care.
The material costs more than vinyl but less than fiber cement, making it a middle-ground option for homeowners who want the appearance of wood without all the maintenance.
Pro Tip: When comparing siding materials, factor in both upfront costs and long-term maintenance expenses. A material that costs more initially might save money over its lifetime through reduced maintenance needs.
|
Material |
Lifespan |
Maintenance Level |
Cost Range |
|---|---|---|---|
|
Vinyl |
20-40 years |
Low |
$ |
|
Wood |
20-40 years |
High |
$$ |
|
Fiber Cement |
50+ years |
Low |
$$$ |
|
Metal |
40+ years |
Low |
$$ |
|
Engineered Wood |
30+ years |
Medium |
$$ |
Your climate, budget, and aesthetic preferences will determine which material works best for your home. Consider how much time you want to spend on maintenance and whether the initial cost fits your renovation budget.

Durability often correlates directly with price and maintenance requirements when comparing siding options:
Vinyl Siding: At $3-7 per square foot installed, vinyl offers excellent value. Quality vinyl resists fading and typically lasts 20-40 years, but it can crack in extreme cold and may dent from impacts.
Wood Siding: Costing between $6-12 per square foot installed, traditional wood requires significant upkeep. You'll need to repaint or restain every 3-7 years and inspect regularly for rot, insect damage, and moisture issues. Cedar and redwood naturally resist decay better than pine or spruce.
Fiber Cement: At $10-15 per square foot installed, this material represents a premium investment that pays off through exceptional longevity—often 50+ years. It requires repainting only every 7-15 years and resists rot, fire, and termites.
Pro Tip: For fiber cement installation, use corrosion-resistant nails specifically designed for this material to prevent unsightly rust streaks down your siding.
Metal Siding: Aluminum and steel typically cost $4-8 per square foot installed. Steel offers superior impact resistance but may rust if scratched, while aluminum never rusts yet dents easily. Both require minimal maintenance beyond occasional cleaning.
Engineered Wood: Priced at $7-13 per square foot installed, this option combines wood's appearance with improved durability against moisture and insects. It generally needs repainting every 5-10 years.
Your local climate should significantly influence your siding decision:
|
Material |
Weather Resistance |
R-Value |
Best Climate |
|---|---|---|---|
|
Vinyl |
Good (brittle in extreme cold) |
0.61 |
Moderate |
|
Wood |
Fair (susceptible to moisture) |
0.81 |
Dry |
|
Fiber Cement |
Excellent (all weather) |
0.50 |
Any |
|
Metal |
Excellent (can expand/contract) |
0.61 |
Any |
|
Engineered Wood |
Good (moisture-resistant) |
0.67 |
Mild to moderate |
Insulation value (R-value) measures thermal resistance—higher numbers indicate better insulation. Standard siding materials offer minimal insulation on their own. For improved energy efficiency, consider:
Cold climates benefit most from fiber cement's durability combined with additional insulation, while hot, humid regions might favor vinyl's moisture resistance. Coastal areas often require specialized materials that resist salt spray—aluminum or fiber cement typically perform best in these conditions.
The ideal siding material balances your budget constraints with performance requirements for your specific climate and maintenance preferences.
Recognizing warning signs early can prevent costly structural damage and help you plan for replacement before emergency repairs become necessary. Regular exterior inspections—ideally twice yearly and after severe weather—help you catch problems while they're still manageable.
Visible damage often indicates serious underlying issues that require immediate attention. Check your exterior walls systematically, paying special attention to these common problem areas:
|
Warning Sign |
What It Indicates |
Material Most Affected |
|---|---|---|
|
Warping/Buckling |
Water infiltration behind panels |
Vinyl, Wood |
|
Soft Spots/Rot |
Moisture damage, possible structural issues |
Wood, Engineered Wood |
|
Green/Black Mold |
Trapped moisture, poor ventilation |
All types |
|
Cracks/Holes |
Impact damage, age deterioration |
Vinyl, Fiber Cement |
|
Loose/Missing Pieces |
Improper installation or storm damage |
All types |
Test suspicious areas by pressing firmly against vinyl panels—if they feel flexible or spongy rather than solid, moisture has likely penetrated the underlayment. For wood siding, gently probe questionable spots with a screwdriver; if the tool easily penetrates, rot has set in, and replacement is necessary.
Pro Tip: Check siding near roof lines, around windows, and at ground level first, as these areas typically show damage sooner due to increased water exposure.
Your home's exterior directly impacts energy consumption, so monitor these less obvious indicators:
Aging siding loses its insulation value as gaps, cracks, and warping create thermal bridges, allowing conditioned air to escape. Many homeowners report utility bill reductions of 10-20% after addressing siding issues, making replacement a smart investment for both comfort and long-term savings.
Siding replacement might seem complex, but the right approach and proper tools make it manageable for most homeowners. This step-by-step process helps you achieve professional results regardless of which siding material you choose.
Gather your essential tools before starting: pry bar, hammer, utility knife, safety glasses, and work gloves. Start at an upper corner and work downward, carefully inserting the pry bar under each panel and gently prying outward. Remove sections one at a time to avoid damaging the underlying structure.
Place a tarp below your work area to catch debris and simplify cleanup once you finish removing the old siding.
Once you've removed the old siding, examine the exposed sheathing thoroughly. Look for these common issues and address them before installing new materials:
|
Damage Type |
Required Action |
|---|---|
|
Water damage/rot |
Replace affected sections completely |
|
Small holes |
Patch with wood putty or similar filler |
|
Loose sections |
Secure with additional nails or screws |
|
Mold growth |
Clean with an appropriate solution before proceeding |
Replace damaged sheathing with matching materials and ensure all sections attach firmly to the frame.
Apply house wrap over the entire sheathing surface, starting from the bottom and working upward. Overlap seams by at least 6 inches and secure with staples every 12-16 inches. Install flashing around all windows, doors, and other openings. These moisture barriers prevent water damage beneath your new siding.
Begin installation at the lowest point, ensuring your first row sits perfectly level. Work upward, overlapping panels according to manufacturer specifications—typically 1-1.5 inches. Cut panels using tin snips, utility knife, or circular saw as needed. Leave a ¼-inch gap at all edges to accommodate thermal expansion.
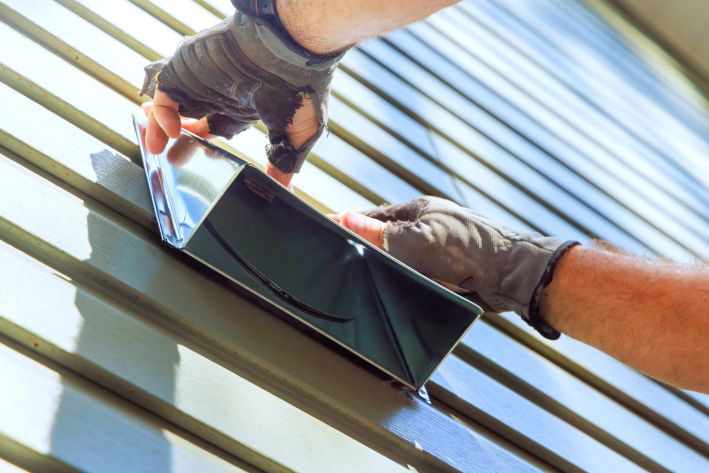
Complete your project by installing J-channels around windows and doors, plus corner posts and trim pieces. These finishing elements enhance appearance while ensuring proper water drainage and protection. Measure and cut each piece carefully for precise fitting. Follow manufacturer guidelines for your specific siding material to ensure optimal performance and longevity.
Vinyl siding requires precise cutting techniques and proper installation methods to achieve professional results. Minor mistakes can lead to moisture penetration or unsightly buckling, so following these vinyl-specific techniques makes the difference between a mediocre job and one that lasts decades.
The right tools make vinyl installation much easier. A circular saw works well for straight cuts, while tin snips excel for detailed cuts around fixtures. Always cut vinyl with the finished side up to prevent jagged edges.
|
Tool |
Best Use |
Cutting Technique |
|---|---|---|
|
Tin Snips |
Notches, small cuts |
Use green snips for right cuts, red for left |
|
Utility Knife |
Scoring and snapping |
Score deeply, then bend to snap cleanly |
|
Circular Saw |
Long straight cuts |
Reverse blade direction for cleaner edge |
When measuring panels, subtract ¼ inch from each end to allow for expansion. Vinyl expands and contracts significantly with temperature changes—up to ½ inch in 12-foot panels.
Pro Tip: Mark cutting lines with a pencil rather than a permanent marker, which might show through lighter-colored vinyl siding.
The most frequent error involves nailing panels too tightly. Leave a 1/32-inch gap (about the thickness of a dime) between the nail head and panel. Space nails 16 inches apart in nail slots—never through the panel itself.
Other common mistakes include:
Many DIYers attempt vinyl installation in cold weather, but vinyl becomes brittle below 40°F, increasing the risk of cracks. Install vinyl siding when temperatures are between 50-80°F for optimal results.
Siding replacement costs vary significantly depending on material choice and whether you hire professionals or tackle the project yourself. Understanding these expenses helps you budget appropriately and make informed decisions about your home investment.
Installation typically accounts for 40-60% of your total project cost, making labor a significant factor in your budget planning.
|
Material Type |
Material Cost (per sq ft) |
Labor Cost (per sq ft) |
Total Cost (per sq ft) |
|---|---|---|---|
|
Vinyl |
$3-7 |
$2-4 |
$5-11 |
|
Wood |
$6-12 |
$3-6 |
$9-18 |
|
Fiber Cement |
$5-11 |
$5-9 |
$10-20 |
|
Metal |
$4-8 |
$4-8 |
$8-16 |
|
Engineered Wood |
$7-13 |
$3-6 |
$10-19 |
For an average 1,500-square-foot home exterior, vinyl siding costs $7,500-16,500 total, while premium options like fiber cement can reach $15,000-30,000.
Taking on the installation yourself can save 40-60% on labor costs. A DIY vinyl siding project might reduce your overall cost by $3,000-6,000 for an average home.
However, professional installation offers several advantages:
Pro Tip: Check manufacturer warranty terms before deciding to install siding yourself. Some warranties require professional installation to remain valid, which could affect long-term value if problems arise.
Consider your skill level, available time, and comfort with power tools when making this decision. The money you save on DIY installation won't matter if improper techniques lead to moisture damage or premature failure.
Proper maintenance extends your siding's lifespan significantly, potentially saving you thousands in premature replacement costs. Regular care keeps your home's exterior looking fresh and performing well for decades.
Each siding material requires specific maintenance approaches. Following the correct procedures prevents damage while preserving your home's appearance and protection.
|
Siding Type |
Cleaning Method |
Maintenance Frequency |
Paint/Stain Cycle |
|---|---|---|---|
|
Vinyl |
Soap, water, soft brush |
Annually |
Never (unless desired) |
|
Wood |
Mild detergent, gentle pressure washing |
Bi-annually |
Every 4-7 years |
|
Fiber Cement |
Water, mild soap |
Every 1-2 years |
Every 7-15 years |
|
Metal |
Soap, water |
Annually |
Every 10+ years (if painted) |
|
Engineered Wood |
Soft brush, mild detergent |
Annually |
Every 5-10 years |
Address minor damage promptly, regardless of your siding material. Small cracks in vinyl can be sealed with matching caulk, while wood typically requires wood filler and sanding before repainting.
Pro Tip: Never use a pressure washer on vinyl siding at high settings—the force can drive water behind panels or cause cracking. Keep at least 1-2 feet of distance and use low-pressure settings only.
Inspect your siding thoroughly each spring, checking for loose panels, gaps, or color fading. Schedule maintenance based on your specific material to maximize both protection and curb appeal.
Siding replacement represents a major home improvement investment that enhances curb appeal, improves energy efficiency, and protects your home's structure. You've learned about different siding materials—from affordable vinyl to premium fiber cement—each suited to specific climates and budgets.
Timing your siding replacement correctly can prevent costly structural damage. Watch for warning signs like warping, rot, or rising energy bills to address problems before they worsen. Proper preparation work, including sheathing inspection, house wrap installation, and flashing, creates the foundation for long-lasting results regardless of which material you choose.
Cost considerations play a significant role in determining whether to opt for DIY installation or hire professionals. DIY projects can save 40-60% on labor costs, but professional installation provides warranty protection and expertise that can prevent costly mistakes. Consider your skill level and available time when making this decision.
Regular maintenance significantly extends your siding's lifespan. Annual cleaning and prompt repairs prevent minor issues from becoming major problems. This approach protects your investment and keeps your home looking its best.
Whether you choose budget-friendly vinyl or premium fiber cement, quality siding installation provides essential protection against weather and moisture. The information in this guide helps you make informed decisions and achieve professional-quality results that will protect your home for years to come.
GET THE ESSENCE OF RELEVANT HOME
IMPROVEMENT TOPICS IN LESS THAN 5 MINUTES

How to Remove Rust Stains from a Bathtub: Effective DIY M...
Those orange and brown rust stains in your bathtub might be frustrating, but they're completely m...

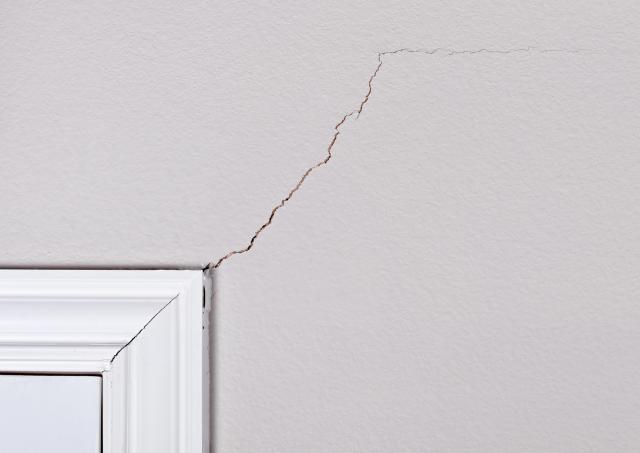
Drywall cracks appear in nearly every home at some point, whether they show up suddenly after a s...

Thanks for joining our homeowners’ community.
Stay tuned!
Choose the category
Choose the category