Best Outdoor Decking Materials for Different Climates
Your climate zone plays a crucial role in determining the best material for your deck. Homeowners...

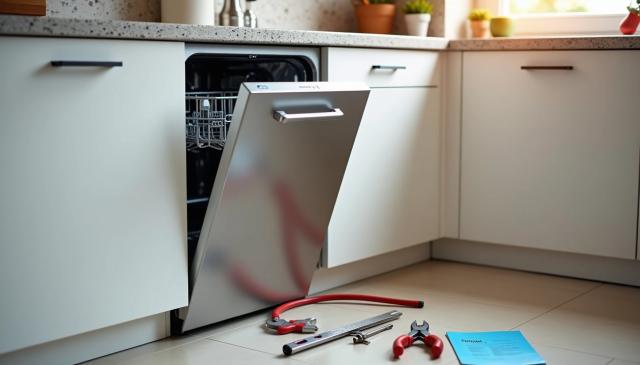
Installing a dishwasher yourself can save you between $200 and $500 in professional installation costs. The project typically takes at least two hours to complete, but doesn't require advanced plumbing or electrical skills. You'll need proper equipment, including a dishwasher installation kit with a 90-degree fitting and water supply line. This project works best when your kitchen already has the appropriate plumbing and electrical connections. Modern dishwashers can even use less water than hand washing, which may lower your monthly utility bills.
Choosing between DIY installation and professional help depends on your experience level, available tools, and budget. The right decision can save you money while ensuring your dishwasher works properly for years.
DIY installation works well for homeowners with moderate plumbing and electrical experience. This approach is most appropriate when:
Check your manufacturer's warranty before starting. Many warranties become void if appliances are self-installed, so verify this important detail first.
The financial benefits are significant. DIY installation saves between $150 and $300 in professional labor costs. This gives you more budget flexibility to invest in a higher-quality dishwasher.
|
DIY Installation |
Professional Installation |
|---|---|
|
Cost savings of $150-$300 |
Peace of mind and guaranteed quality |
|
Requires basic plumbing/electrical skills |
Ensures code compliance |
|
Works best for simple replacements |
Necessary for complex modifications |
|
Typically takes longer to complete |
Completed in 1-4 hours |
Best for: Homeowners replacing existing dishwashers who have basic plumbing and electrical skills.
Certain situations require professional installation. Hire a pro if:
Professional installers understand local building codes and can troubleshoot unexpected problems during installation. "One mistake can lead to flooding or electrical issues that cost far more than labor," making the professional fee worthwhile in many cases.
Best for: First-time dishwasher installations or homes requiring electrical/plumbing modifications.
Professional installation labor typically costs between $150 and $300, with most homeowners paying about $200 for labor. For complete installations, expect total costs to be between $1,000 and $1,500, with an average of $1,200. This includes both the appliance and installation services.
Several factors can increase your budget:
Pro Tip: Professional installation typically takes 1-4 hours, with a minimum of 2 hours required if an existing unit needs to be removed or modifications are necessary. Plan accordingly to minimize kitchen disruption.
Remember that improperly installed dishwashers can cause water damage or electrical problems that likely won't be covered by homeowner's insurance. Weigh the long-term implications alongside immediate cost savings when making your decision.
Proper preparation makes dishwasher installation much smoother and prevents costly mistakes. Having the right tools, shutting off utilities safely, and preparing your workspace correctly saves time and reduces complications during the actual installation process.
Gather all necessary equipment before starting your installation. The following table outlines essential items for a standard dishwasher installation:
|
Basic Tools |
Materials |
Safety Equipment |
|---|---|---|
|
Cordless drill |
90° elbow fitting |
Safety glasses |
|
Phillips screwdriver |
Hot water supply line |
Gloves |
|
Adjustable wrench |
Drain hose |
Flashlight |
|
Socket wrench |
Wire nuts (3) |
Bucket/shallow pan |
|
Level |
Strain relief |
Towel/cardboard |
|
Pliers |
Electrical cable/power cord |
Masking tape |
|
Measuring tape |
Hose clamp |
- |
|
Utility knife |
Hand shut-off valve |
- |
|
Tubing cutter |
- |
- |
Pro Tip: Keep a towel or piece of cardboard handy to protect your floors when removing the old dishwasher and sliding in the new one. Many manufacturers recommend placing unboxed dishwashers on their backs for easier access to plumbing and electrical connections.
First, locate your electrical panel and turn off power to the kitchen circuit. This step prevents electrical shock and is often overlooked by eager DIYers.
For water shutoff, follow these steps:
Dishwashers require a dedicated water supply line with a proper shut-off valve. This valve lets you quickly stop water flow during emergencies or repairs. Older homes, especially apartments, may need help locating or accessing this valve.
Pro Tip: Always verify the water is completely off by turning on the kitchen faucet. No water should flow once the supply is properly shut off.
Your cabinet opening must meet specific dimensions for proper dishwasher installation. Standard measurements include:
Prepare the space thoroughly by completing these tasks:
For corner installations, allow at least 2 inches of clearance between the dishwasher and adjacent cabinets or walls. This prevents the door from hitting cabinetry when opened.
The rough cabinet opening must accommodate the dishwasher plus all connections. Keep the drain hose no longer than 12 feet for proper drainage. Temporarily secure the drain hose and water supply line to the floor with tape to prevent movement when pushing the dishwasher into place.
Pro Tip: Take photos of existing connections before disconnecting anything if you're replacing an old dishwasher. These reference images prove invaluable during reassembly.
Proper installation requires the dishwasher to be positioned square and level at both the top and bottom, with all four legs firmly in contact with the floor. This ensures optimal performance and prevents water leakage issues.
Your preparation work is complete, so you can now focus on the actual installation. Proper connections and positioning ensure your dishwasher provides years of reliable service. These steps cover everything from connecting utilities to securing the unit in place.
Modern dishwashers offer two power connection options, each with specific benefits:
|
Connection Type |
Advantages |
Installation Notes |
|---|---|---|
|
Plug-in cord |
Easier to disconnect for service, simpler installation |
Requires a dedicated GFCI outlet, typically 120V/20A |
|
Hardwired |
Cleaner look, more permanent connection |
Requires direct connection to the home's electrical system |
For plug-in installation, attach the power cord to the dishwasher's connection box. Connect black to black (hot), white to white (neutral), and green to the grounding screw.
A cord acts as a disconnect for the appliance, and dishwashers in dwellings must be GFCI-protected since the 2017 NEC code cycle.
Attach the 90-degree elbow fitting to the water valve at the bottom of the dishwasher. Hand-tighten first, then use pliers to tighten an additional ¼ to ½ turn. Connect the water supply line to this fitting.
Dishwashers connect to the hot water supply for effective cleaning and sanitizing. Route the water supply line toward the rear of the dishwasher.
The drain hose must create either a high loop or connect to an air gap device to prevent backflow. For a high loop, secure the hose at least 20 inches from the floor using plumbing hanger tape. Connect the other end to either:
Secure all connections with appropriate hose clamps.
Route the power cord, drain hose, and water supply line through the sink cabinet before sliding the dishwasher into place. Check that the dishwasher is level both front-to-back and side-to-side using a level. Adjust the leveling legs as needed—turn counterclockwise to raise the dishwasher and clockwise to lower it.
Firmly pushing against the top of the dishwasher takes weight off the leveling legs, making them easier to adjust.
After confirming the dishwasher is level and properly positioned, attach anchor brackets to the top of the dishwasher collar on both sides. The exterior should be flush with the surrounding cabinet doors. Secure the brackets to the underside of the countertop with the provided screws.
Test all connections by turning on the water supply and power. Run a test cycle to check for leaks or alignment issues.
After securing your dishwasher in place, the final phase confirms everything works properly. The test run helps you avoid water damage, electrical issues, or poor performance later. This phase verifies the unit functions correctly and identifies any potential problems before regular use.
Restore power to your newly installed dishwasher by turning the circuit breaker back on. Connect the water supply line to the hot water line according to your product manual's instructions. Open the water at the shut-off valve, gradually turning it counterclockwise until fully open. This careful approach prevents sudden pressure changes that might stress new connections.
|
Reconnection Step |
Action |
Verification Method |
|---|---|---|
|
Power |
Turn on the circuit breaker |
The control panel lights up |
|
Water |
Open shut-off valve |
Check for proper pressure |
|
Drain |
Confirm proper position |
Ensure no kinks in the hose |
Run a complete test cycle to verify all systems function properly. Test cycle instructions vary by model, so refer to your specific product manual. Monitor the dishwasher's operation closely—listen for unusual noises or vibrations that might indicate installation problems.
For brand new units, consider running an empty load with a cup or two of white vinegar, which helps clean manufacturing residue from the interior.
Examine all connections for water leakage as the test cycle operates. Pay particular attention to:
If you spot leaks, gently tighten the fittings a bit more. Be careful not to over-tighten, which can damage components or create new leaks.
Verify the dishwasher is properly level by checking if the rack rolls in or out on its own when the door is open. The unit should sit flush with surrounding cabinet fronts for a clean, integrated look.
Even properly installed dishwashers occasionally experience problems. Understanding common issues helps you troubleshoot quickly without calling a professional for every minor malfunction.
If standing water remains after cycles, check these common causes:
When your dishwasher won't fill with water, check these potential issues:
A door that won't close properly prevents operation:
Regular maintenance prevents problems:
Pro Tip: Perform monthly maintenance after installation to extend your dishwasher's lifespan and maintain optimal cleaning performance.
Dishwasher installation works well as a DIY project when you have existing plumbing and electrical connections. Proper preparation and following the step-by-step process outlined above ensure safe, functional results while saving $150 to $300 in professional labor costs.
Proper leveling and secure connections prevent future problems with leaks or poor performance. Regular maintenance, like cleaning filters and spray arms, extends your dishwasher's lifespan and maintains optimal cleaning performance.
Remember that certain situations require professional help—particularly when you need new plumbing connections, electrical upgrades, or cabinet modifications. The satisfaction of completing this project yourself brings both immediate cost savings and valuable home maintenance knowledge.
Your newly installed dishwasher should provide years of reliable service while making kitchen cleanup easier. The time spent on careful installation prevents water damage and ensures efficient operation.
GET THE ESSENCE OF RELEVANT HOME
IMPROVEMENT TOPICS IN LESS THAN 5 MINUTES

Best Outdoor Decking Materials for Different Climates
Your climate zone plays a crucial role in determining the best material for your deck. Homeowners...

Building a deck offers one of the most effective ways to expand your outdoor living space, boost...

Thanks for joining our homeowners’ community.
Stay tuned!
Choose the category
Choose the category