Kitchen Countertop Replacement Guide: From Cost to Instal...
Kitchen countertop replacement typically costs between $1,000 and $5,500 for most standard kitche...

Cracked, peeling, or moldy bathtub caulk is a sign of trouble ahead. When caulk fails, water seeps behind your tub and walls, creating conditions for expensive damage and unhealthy mold growth. Recaulking your bathtub properly prevents water damage that can cost thousands in repairs. This straightforward DIY project takes only a few hours but delivers years of protection when done correctly. Most homeowners delay this essential maintenance task, yet deteriorating caulk allows water to penetrate behind walls where it causes structural damage you won't see until extensive repairs become necessary. You'll learn when to recaulk your tub, which materials work best for bathroom applications, and how to apply new caulk with professional precision. We'll also cover common mistakes that cause premature caulk failure and how to avoid them. These proven techniques help you create a watertight seal that looks great and protects your bathroom from moisture damage.
Bathtub caulk serves as your bathroom's primary defense against water damage. Recognizing when to replace failing caulk prevents costly repairs and maintains a healthy bathroom environment. Regular inspection helps you catch problems before water penetrates behind walls, where it causes structural damage.
Visual inspection reveals when your bathroom needs fresh caulk. Look for these warning signs that indicate it's time to recaulk:
|
Warning Sign |
What It Means |
Urgency Level |
|---|---|---|
|
Discoloration |
Mold or mildew growing within the caulk |
Medium-High |
|
Cracking or splitting |
Seal integrity compromised |
High |
|
Peeling away from the surface |
Complete seal failure |
Immediate |
|
Brittleness/hardness |
Caulk has lost elasticity |
Medium |
|
Water seeping behind fixtures |
Active water damage is occurring |
Immediate |
Pay attention to corners and seams where two surfaces meet—these areas experience the most stress from building movement. If you can easily pull away caulk sections with your fingernail, the adhesion has failed, and water can seep beneath.
Pro Tip: Run your finger along the caulk line after showering. Moisture trapped under the caulk or soft spots indicates water has penetrated the seal, and recaulking shouldn't be delayed.
Most bathroom caulk needs replacement every 5 years under normal conditions, but several factors can shorten this timeline:
The quality of your original caulking job significantly impacts longevity. Properly applied silicone caulk in a well-ventilated bathroom can last 7-10 years, while poorly applied acrylic caulk in a steamy bathroom might fail within months.
Intact caulk protects both your home's structure and your family's health. When caulk fails, several problems develop:
Moisture infiltration behind tiles and fixtures can damage the underlying drywall, subfloor, and floor joists. This hidden damage often goes unnoticed until expensive repairs become necessary.
Failed caulk creates warm, damp conditions ideal for mold and mildew growth. These fungi release spores that trigger allergic reactions, respiratory issues, and other health problems—particularly dangerous for people with asthma or compromised immune systems.
Water can travel surprisingly far once it penetrates gaps between your tub and surrounding surfaces. The damage may extend to adjacent rooms or even the ceiling below in multi-story homes.
Remember that curing time affects your caulk's performance. Most standard bathroom caulks require 24-48 hours to fully cure before water exposure. Some products offer "shower-ready" formulations that tolerate moisture after 30 minutes to 3 hours, though complete curing still takes a full day. Following the manufacturer's drying time prevents premature seal failure and ensures maximum durability.
Proper tools and materials make the difference between a professional-looking caulk job and a messy failure. Unlike simpler DIY projects, bathtub recaulking requires specific equipment to achieve a watertight seal that lasts. The quality of your materials directly affects how long your caulk job protects against water damage.
If you don’t want to invest in specialized tools or lack the time and confidence to tackle the job yourself, consider requesting professional help through the online form to get matched with experienced local contractors.
Gather these specific tools before starting your project:
Pro Tip: Choose a caulk finishing tool with multiple edge profiles rather than using your finger. This creates more consistent results and prevents skin irritation from caulk chemicals.
The two main caulk types for bathrooms offer different advantages:
|
Feature |
Silicone Caulk |
Acrylic Caulk |
|---|---|---|
|
Water resistance |
Excellent |
Good |
|
Flexibility |
Highly flexible |
Less flexible |
|
Mold resistance |
Superior |
Moderate |
|
Paintability |
Cannot be painted |
Can be painted |
|
Adhesion |
Excellent on smooth surfaces |
Works on more materials |
|
Durability |
7-10 years |
3-5 years |
|
Application difficulty |
More challenging |
Easier for beginners |
|
Cost |
Higher |
Lower |
Silicone caulk creates a superior watertight seal and resists mold better than acrylic options. Most professionals recommend 100% silicone caulk for areas directly exposed to water. Acrylic caulk offers easier application and cleanup, plus you can paint over it if needed.
Consider these key factors when selecting caulk for your bathtub project:
Look for products specifically labeled "kitchen and bath" or "tub and tile." These formulations contain mildewcides that prevent mold growth in humid conditions.
Color matching matters for appearance. Clear caulk works with any surface but yellows over time. White remains the most popular bathroom choice, while colored caulk can match specific tiles or fixtures.
Check the "shower-ready" time on the package. Premium products like GE Silicone II offer 30-minute shower-ready formulations, though complete curing still requires 24 hours. Standard caulks need 24-48 hours before water exposure.
Examine the tube nozzle design. Angled tips make application easier in tight corners where your tub meets the wall.
For bathtub recaulking, 100% silicone caulk provides the best long-term performance due to superior water resistance and flexibility. While more challenging to work with initially, silicone delivers significantly better protection against water damage and mold growth compared to acrylic alternatives.
Pro Tip: First-time caulkers should consider quick-cure silicone products that offer more working time to perfect their technique while still providing faster water readiness than standard formulations.

Old caulk must come off entirely before you apply new material. Use a plastic razor scraper or specialized caulk removal tool to cut through existing caulk. Work methodically around all seams where the tub meets walls or floor. For stubborn areas, a utility knife can be helpful, but be sure to avoid scratching the tub surface.
Pro Tip: Apply caulk softener to hardened caulk and let it sit for 2-3 hours to make removal much easier.
Clean the area thoroughly with rubbing alcohol or a vinegar solution to eliminate soap scum, mildew, and residue. Any contaminants prevent the proper adhesion of new caulk. Dry the surface completely after cleaning—moisture interferes with caulk adhesion.
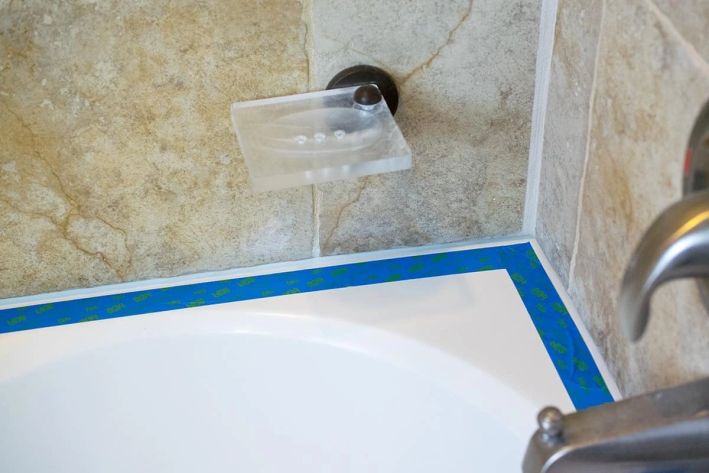
Apply painter's tape along both sides of the seam, leaving only the gap exposed. This creates a precise channel for caulk, preventing messy overflow. Press tape firmly against surfaces to prevent caulk from seeping underneath.
Cut the caulk tube nozzle at a 45-degree angle, making a hole approximately 1/8 to 1/4 inch in diameter. Match the opening size to the width of your gap. Puncture the inner seal with the caulk gun's built-in piercing tool.
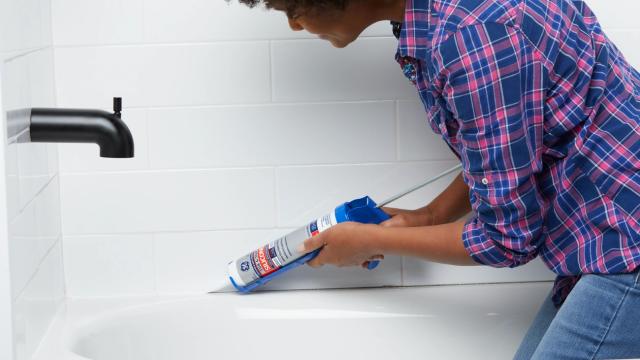
Load the tube into your caulk gun and apply steady pressure while moving along the seam at a consistent pace. Hold the gun at a 45-degree angle to the joint. Apply just enough caulk to fill the gap without excess—less is more with caulking.
|
Common Mistake |
Better Approach |
|---|---|
|
Applying too much caulk |
Use a minimal amount that fills the gap |
|
Moving too quickly |
Maintain a steady, even pace |
|
Inconsistent pressure |
Apply constant pressure on the trigger |
Within 5-10 minutes of application (before the caulk begins to set), smooth the bead using a caulk finishing tool or your finger dipped in water. Pull the painter's tape away immediately after smoothing, while the caulk is still wet. Pull tape at a 45-degree angle away from the caulk line for the cleanest removal.
Pro Tip: For silicone caulk, use a solution of dish soap and water as a lubricant on your finger or smoothing tool to prevent sticking and create a perfectly smooth finish.
Patience protects your caulking investment after it has been applied. The curing period determines whether your project succeeds or fails, regardless of application technique. Understanding the difference between "shower-ready" time and complete curing prevents premature seal failure.
Waiting periods vary significantly by caulk type and brand:
|
Caulk Type |
Shower-Ready Time |
Full Cure Time |
|---|---|---|
|
Standard Silicone |
24-48 hours |
7-10 days |
|
Quick-Dry Silicone (GE Silicone II) |
30 minutes - 3 hours |
24 hours |
|
Standard Acrylic |
24 hours |
3-5 days |
|
Siliconized Acrylic |
12-24 hours |
2-7 days |
Check your specific caulk tube for manufacturer recommendations. Even "30-minute shower-ready" products shouldn't face direct high-pressure water spray until fully cured.
Increase air circulation with fans directed at the caulked areas. Maintain room temperature between 65-75°F for optimal curing conditions. Run a dehumidifier to reduce bathroom humidity. Keep shower curtains or doors open to maximize air exposure. Rushing the process too aggressively can crack the caulk or weaken adhesion.
Premature water exposure creates costly problems. Uncured caulk may wash away or become misshapen, leaving gaps where water penetrates. Moisture trapped under partially cured caulk creates ideal mold growth conditions. Complete adhesive bond failure requires removing everything and starting over.
"Shower-ready" caulk remains vulnerable until completely cured. Allow the full recommended curing time whenever possible before normal shower use.
Poor caulking technique can waste your time and money. These common errors compromise your tub's waterproof seal, leading to premature failure.
Choose products specifically labeled "kitchen and bath" or "tub and tile" that contain mildewcides. 100% silicone caulk offers the best moisture resistance and flexibility for bathtub applications. While more challenging to work with than acrylic alternatives, silicone provides better long-term protection against water damage and mold growth.
Inadequate surface preparation is the primary cause of most caulking failures. Remove all old caulk completely—any fragments prevent proper adhesion of new material. Clean the area thoroughly with rubbing alcohol to eliminate soap scum and residue. Make sure the surface is completely dry before applying new caulk.
|
Problem |
Solution |
|---|---|
|
Too much caulk applied |
Use a minimal amount that fills the gap |
|
Inconsistent pressure |
Maintain steady pressure on the caulk gun |
|
Uneven application |
Keep a consistent pace and angle |
Best approach: Apply just enough caulk to fill the gap. Excess caulk creates messy results and actually weakens the seal's effectiveness.
Most standard bathroom caulks need 24-48 hours before water exposure, regardless of "quick-dry" labels. Premature shower use causes complete seal failure, forcing you to remove everything and start over. Check your specific product's recommended drying time and wait the whole period for best results.
Recaulking your bathtub prevents water damage that can cost thousands in repairs. You've learned to recognize when caulk needs replacement, choose the right materials for bathroom applications, and apply new caulk with professional results.
Quality caulking technique makes the difference between a seal that lasts for years and one that fails within months. Remove old caulk completely, clean surfaces thoroughly, and allow proper curing time before using your shower. These steps ensure your new caulk performs as intended.
Bathroom caulk serves as your first defense against moisture damage behind walls and fixtures. A few hours of careful work now prevent expensive structural repairs later. Your recaulked tub will look better and protect your home when you follow proven techniques and choose quality materials.
This straightforward DIY project saves money while protecting your bathroom's structural integrity. Focus on proper surface preparation, choose 100% silicone caulk for best results, and resist the urge to use your shower too soon. These fundamentals help you achieve a watertight seal that lasts.
GET THE ESSENCE OF RELEVANT HOME
IMPROVEMENT TOPICS IN LESS THAN 5 MINUTES

Kitchen Countertop Replacement Guide: From Cost to Instal...
Kitchen countertop replacement typically costs between $1,000 and $5,500 for most standard kitche...

Removing old carpet flooring can transform a room and reveal the hidden potential of the surface...

Thanks for joining our homeowners’ community.
Stay tuned!
Choose the category
Choose the category