How to Soundproof Windows: Proven Methods for Noise Reduc...
Window soundproofing costs range from $15 for simple DIY fixes to over $2,100 for complete window...

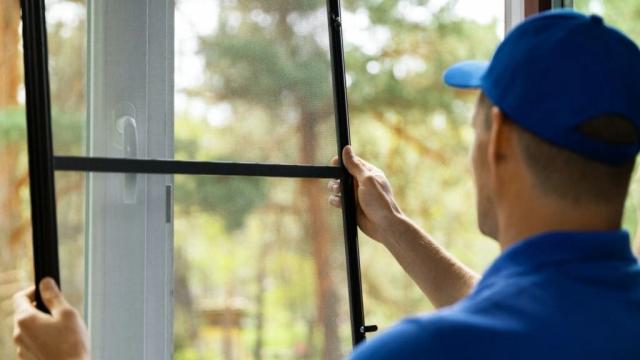
Window screen replacement stands as one of the most manageable DIY projects for homeowners, typically requiring under 2 hours to complete from start to finish. You can tackle this project yourself and save considerable money compared to professional installation, with materials generally costing less than $20 per window. Fresh screens enhance your home's appearance while improving security and airflow. You'll enjoy bug-free ventilation without the wait time that comes with scheduling professional repairs. Each window takes approximately 10 minutes to complete once you understand the process. This guide covers screen replacement for different window types, helping you select appropriate materials and achieve a secure, long-lasting installation that performs well for years to come.
Understanding your specific window type determines the correct approach for removing and installing the screen. Different window designs require distinct techniques, making proper identification crucial before you begin your replacement project. The four most common window types each have unique characteristics that affect the screen replacement process.
Sliding windows (also called gliders) move horizontally along tracks rather than vertically. You'll find these space-saving windows in kitchens, bathrooms, basements, and living rooms where their contemporary design fits well.
Key features of sliding windows:
These windows function like double-hung windows rotated to a horizontal orientation. This distinction matters when ordering replacement screens since the dimensions and attachment mechanisms differ significantly from vertical windows.
Pro Tip: Check if your window sashes move side to side rather than up and down to identify sliding windows. Look for screen channels along the top and bottom of the frame where the screen slots into place.
Double-hung windows represent the most popular window design in the United States. Both the top and bottom sashes open and close independently, offering superior ventilation control.
Unlike single-hung windows, where only the bottom pane moves, double-hung designs let you slide the bottom sash up for cool air intake while the top sash slides down for warm air exhaust.
Double-hung window screen characteristics:
Screen replacement on double-hung windows accommodates the window's dual functionality without interfering with operation or blocking sightlines.
Casement and awning windows use crank systems to open outward rather than sliding along tracks. The orientation determines which type you have:
|
Window Type |
Opening Direction |
Common Locations |
|---|---|---|
|
Casement |
Vertical (sideways) |
Kitchens, bathrooms, sunrooms |
|
Awning |
Horizontal (upward) |
Above fixed windows, tight spaces |
Both types work well in tight spaces where ventilation control matters most. Their screens feature flanged designs that create secure, leak-resistant seals with robust frame profiles.
Casement window screens need specific replacement latches based on your window brand. Andersen® windows use wing blades compatible with 100 Series, 400 Series, and A-Series Casement Windows.
Fixed frame windows don't open—they provide light and visibility only. Screen installation typically happens on the exterior rather than integrated into frame mechanisms.
Fixed window screen frames employ simpler designs, as they don't require moving parts. However, precise measurement remains essential for a proper fit against the exterior window frame.
Measure the outer dimensions of the window frame rather than just the glass area for fixed windows. Accurate measurements are crucial since these screens are secured using external clips or fasteners rather than built-in channels.
Correct window type identification serves as the foundation for successful screen replacement. Each type requires specific removal and installation techniques to ensure a proper fit and long-term performance.
Selecting the appropriate screen material determines how long your screen lasts and its performance in various conditions. Your material choice affects durability, visibility, and maintenance requirements. Consider your specific needs, from climate conditions to household factors, when evaluating your options.
Fiberglass and aluminum represent the two primary choices for window screens, each offering distinct advantages based on your priorities.
|
Feature |
Fiberglass |
Aluminum |
|---|---|---|
|
Durability |
Flexible, resists dents and creases |
Stronger, less prone to tearing |
|
Visibility |
Less visible, better outward view |
More visible, may obstruct views more |
|
Weather Resistance |
Excellent in coastal areas, won't corrode |
Can oxidize in coastal regions |
|
Cost |
More affordable, cost-effective |
Generally pricier |
|
Strength |
Good for standard use |
Better protection against punctures |
|
Installation |
Highly flexible, easier DIY installation |
More challenging to install solo |
Fiberglass screens offer excellent visibility with minimal sunlight glare while remaining flexible and resistant to unraveling. This forgiving nature makes them particularly suitable for DIY installations and homes with children.
Aluminum screens offer superior strength and maintain their shape more effectively over time. They resist sagging and provide better protection against larger insects, such as grasshoppers, that might damage other materials.
Pro Tip: Opt for fiberglass for coastal homes to prevent corrosion issues that can affect aluminum screens over time.
Pet-resistant screens use vinyl-coated polyester that's approximately 7 times stronger than traditional fiberglass screens. These heavy-duty options effectively resist tears, punctures, and snags from pet claws and teeth. Despite their rugged construction, they maintain excellent visibility and airflow comparable to conventional screens.
Solar screens focus on energy efficiency and sun protection:
These screens come in various densities (typically 70%, 80%, or 90%), allowing you to choose how much sunlight to block. Although slightly more visible than standard screens, the energy savings often justify this minor trade-off.
Pro Tip: Solar screens made with vinyl-coated polyester offer dual benefits—pet resistance plus energy efficiency for households with both needs.
Accurate measurements ensure your replacement screen fits properly. Your measurement approach depends on whether you have an existing screen frame.
If you have an old screen frame:
Without an existing frame, measure the window frame itself:
For single or double-hung windows:
For sliding windows:
Pro Tip: Take photos of your window along with measurements to ensure you purchase the correct replacement materials.
Select materials based on your window type, local environmental conditions, and household needs to ensure optimal performance and value.
Screen removal requires the right approach for your specific window type. You can safely detach screens from any window without damaging the frame when you use proper techniques. This section covers removal methods for different window styles, spline extraction, and frame preparation.
Each window design requires a specific removal approach:
|
Window Type |
Removal Method |
Key Tools |
|---|---|---|
|
Sliding |
Open the window fully, look for the release lever/latch, and slide horizontally out of the track |
Flathead screwdriver |
|
Double-hung |
Locate springs/tabs at the top/bottom, compress springs, and tilt the screen inward |
None usually needed |
|
Casement |
Find latches/clips on the sides, disengage them, and lift the screen out |
Flathead screwdriver |
|
Fixed frame |
Remove exterior hardware (may have brackets/screws) |
Screwdriver set |
Sliding windows require you to open the window completely and locate the release mechanism at the top or bottom edge. Tilt the screen toward you at an angle, then slide it horizontally out of the track.
Double-hung windows typically use spring mechanisms or tabs. Compress the springs (located on the screen frame sides) toward the window center, then pull the screen inward at an angle.
Pro Tip: Check for dirt or debris in tracks if screens resist removal. Clean tracks thoroughly before attempting removal again.
Once you detach the screen frame:
A deteriorated or melted spline may require cutting into manageable sections with a utility knife. Use a small flathead screwdriver to scrape out the remaining pieces.
Thorough frame cleaning ensures proper adhesion and longevity:
Pro Tip: Mild soap solution works well for most frames. Avoid abrasive cleaners that can scratch the finish.
Wooden screen frames using staples or nails require careful fastener extraction with a staple remover or claw hammer before proceeding with installation.
Screen installation requires careful attention to technique and tension. The right approach ensures your screen remains taut and functional for years without sagging or premature wear.
Unroll your screen material over the frame on a flat work surface. Cut the screen with a 1-2 inch overlap on all sides—this extra material provides the working room needed for proper tensioning. Insufficient overlap prevents adequate coverage and secure attachment to the frame channels.
For aluminum screens, use the convex side of your spline roller to pre-roll the screen material into the frame channels before installing the spline. This step creates better contact and prevents wrinkles. Fiberglass screens don't require this preliminary step due to their flexible nature.
The spline roller serves two distinct functions depending on which side you use:
|
Roller Side |
Purpose |
Application Method |
|---|---|---|
|
Concave (grooved inward) |
Pressing the spline into the channel |
Short, consistent strokes in one direction |
|
Convex (rounded outward) |
Pre-rolling metal screens |
Light pressure to shape the screen material |
Start at one corner and press the spline into the groove using your fingers initially. Roll consistently in the same direction throughout installation—reversing direction can damage the spline or create loose sections. At corners, bend the spline at a 90-degree angle and press it securely using a flathead screwdriver.
Proper screen tension comes from technique rather than excessive stretching. Hold the screen material firmly as you work around the frame perimeter. The process of pushing the screen into the channel creates natural tension without overstretching the material.
Secure two adjacent sides first, then place a weight in the center of the screen before completing the remaining two sides. This method distributes tension evenly and prevents the common problem of one side becoming too loose while the opposite side is overly tight.
Once the spline secures the screen around the entire frame perimeter, trim excess material with a sharp utility knife. Cut along the outside edge of the frame channel, keeping the blade angled slightly outward to avoid cutting into the installed screen material.
Run the knife in smooth, continuous strokes rather than short, choppy cuts to achieve clean edges that won't fray over time.
Proper reinstallation determines whether your screen replacement project is successful or requires additional work. You'll need to reattach the screen correctly and verify it operates smoothly. This final step ensures your new screen functions properly and lasts for years to come.
Each window style requires a specific approach for reinstallation:
|
Window Type |
Reinstallation Method |
Key Consideration |
|---|---|---|
|
Sliding |
Insert into track, align with attachments |
Ensure springs align properly in the channel |
|
Double-hung |
Compress springs, insert the top into the upper track |
Push up from the bottom to compress the springs |
|
Casement/Awning |
Position screen, engage latches/clips |
Listen for a click/snap indicating proper placement |
|
Fixed Frame |
Secure using exterior hardware |
Check that the frame sits flush against the window |
For screens with tension springs, place the spring side into the groove first, push the opposite side carefully, then release gradually to allow proper compression.
Inspect your reinstalled screen systematically:
A correctly installed screen will be taut without sagging. The frame should sit evenly, without wobbling or protruding from the window opening.
Address these problems promptly to prevent further complications:
Solving these issues quickly saves time and prevents the need for complete screen replacement later.
Window screen replacement delivers immediate benefits with minimal time investment and basic materials. You now have the knowledge to identify window types, select appropriate materials, and complete the installation process successfully.
Proper measurement forms the foundation of any successful screen replacement. Take precise dimensions of your existing frame or window opening to ensure the best fit across all window styles.
Material choice affects both performance and longevity. Fiberglass provides flexibility and clear visibility, while aluminum offers superior strength. Pet-resistant screens withstand damage from animals, and solar options reduce heat gain and UV exposure.
Check your completed installation for proper tension and secure attachment. Address any gaps or sagging immediately to prevent future problems. A well-installed screen should sit taut and flush against the frame without wobbling.
This simple project enhances security, improves appearance, and maintains comfortable airflow throughout your home. You can now handle screen replacement confidently whenever maintenance becomes necessary.
Master window screen replacement in under 2 hours with these essential insights that will save you money and improve your home's functionality.
This DIY project typically costs under $20 per window and takes just 10 minutes per screen once you understand the process. Proper installation ensures years of bug-free ventilation while maintaining your home's security and appearance.
GET THE ESSENCE OF RELEVANT HOME
IMPROVEMENT TOPICS IN LESS THAN 5 MINUTES

How to Soundproof Windows: Proven Methods for Noise Reduc...
Window soundproofing costs range from $15 for simple DIY fixes to over $2,100 for complete window...

Window screen removal is a common maintenance task that many homeowners approach incorrectly, lea...

Thanks for joining our homeowners’ community.
Stay tuned!
Choose the category
Choose the category