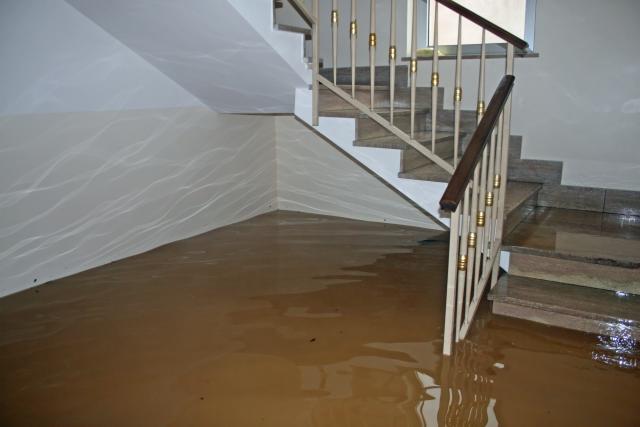
Complete Guide to Flood Damage Repair and Restoration
Water damage stops for no one, and neither should your response. When water enters your home, you...

You could save $150 to $450 in plumber fees by replacing a tub faucet yourself. The task may seem complicated, but beginners can handle this home repair project with ease. The thought of damaging their plumbing makes many homeowners hesitate to replace a tub faucet stem or spout. The project can be completed in under two hours when you have the right tools and follow proper guidance. Success depends on knowing whether your spout is slip-on or threaded before you begin. In this piece, the process of bathtub faucet replacement is broken down into simple steps. The guide covers everything from faucet type identification and tool collection to removing old parts and installing new ones. You'll also discover solutions to address common problems, such as stuck faucets and leaks, after installation.
You need to know exactly what type of tub faucet you have before buying replacement parts. The right identification will save you extra trips to the hardware store and give you a perfect fit for your new components.
Tub faucets come in two basic types: slip-on (compression-fit) and threaded spouts. Each type requires different tools and parts for replacement.
|
Feature |
Slip-on Spouts |
Threaded Spouts |
|---|---|---|
|
Attachment |
Slides onto copper pipe with O-ring seal |
Screws directly onto threaded pipe |
|
Identification |
Has a set screw on the underside |
No set screw, twists off counterclockwise |
|
Removal method |
Loosen the set screw, pull straight out |
Twist counterclockwise to unscrew |
|
Common in |
Newer installations (post-1970) |
Older homes, traditional plumbing |
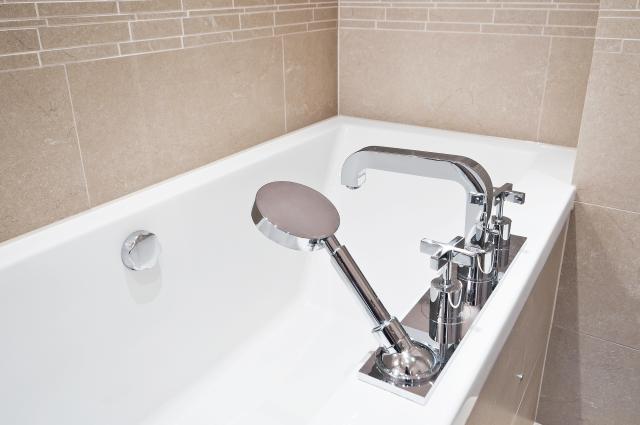
Slip-on spouts slide right onto a copper pipe, secured in place by a small set screw on the bottom. Threaded spouts work differently - they screw onto threaded pipe fittings, just like a nut on a bolt.
Pro Tip: Unsure of the type you have? Try this quick test: gently twist the spout. Threaded spouts will move slightly, but slip-on spouts won't budge unless you loosen the set screw first.
The quickest way to spot a slip-on faucet is to look for a set screw. Look at the bottom of your spout where it meets the wall. You'll usually find the set screw right there.
Here's how to check:
No set screw in sight? You probably have a threaded spout. Some older slip-on models might use a retaining ring or clip instead of a screw.
Selecting the correct faucet type is a crucial aspect of the bath faucet replacement job. The replacement parts must match your plumbing setup perfectly. The wrong parts will just waste your time and test your patience.
Different faucet types require different tools and steps for replacement. To name just one example, threaded spouts need a pipe wrench or strap wrench, while slip-on spouts just need an Allen wrench for the set screw.
Your replacement parts' measurements depend on your faucet type. Threaded spouts need matching thread sizes and types (IPS or NPT). Slip-on spouts must match the diameter and length of your copper stub-out pipe.
The biggest problem with misidentifying your faucet is the potential for damage to your plumbing. Using too much force to remove what you think is a threaded spout could break the copper pipe inside your wall. This turns a simple DIY fix into an expensive plumbing emergency.
Important: Can't figure out your faucet type? Take clear photos from several angles and show them to a hardware store expert before buying any parts.
Good preparation sets the foundation for successful tub faucet replacement. You'll save time and avoid common problems during the replacement process by identifying your faucet type and getting the right tools ready in your workspace.
The tools you need will vary slightly depending on your faucet type: slip-on or threaded. Getting everything ready before you start helps avoid rushed trips to the hardware store.
|
Tool |
Purpose |
Faucet Type |
|---|---|---|
|
Allen wrench set |
Removing set screws |
Slip-on |
|
Adjustable wrench |
Loosening/tightening connections |
Both |
|
Pipe wrench |
Removing threaded spouts |
Threaded |
|
Screwdriver set |
Removing handle screws |
Both |
|
Plumber's tape |
Sealing threaded connections |
Both |
|
Penetrating oil |
Loosening corroded parts |
Both |
|
Utility knife |
Removing old caulk |
Both |
|
Silicone caulk |
Sealing a new installation |
Both |
You may need specialized tools, depending on your specific faucet model. A cartridge puller can be a lifesaver for cartridge-style faucets, while a seat wrench is handy for replacing tub faucet stems with valve seats. If you’re unsure which tools to use or run into complications, professional faucet replacement services can ensure the job is done safely and correctly.
Pro Tip: Take photos of your existing faucet before disassembling it. These pictures will help you remember the original setup during reassembly.
Your bathtub can get scratched or damaged during a bath faucet replacement project. The right protection makes all the difference.
Start by laying a thick towel or rubber mat on the bottom of your tub. This creates a safe spot for your tools and protects your tub from chips or cracks. The soft surface also cushions your knees while you work.
Your drain also requires special attention. Cover it with a drain cover or tape a washcloth over the opening. This stops screws, washers, and bits of plumber's tape from causing expensive clogs.
For wall-mounted fixtures, put painter's tape around the faucet area. This guards against scratches from slipping wrenches or other tools.
Pro Tip: Keep a small container or magnetic tray nearby for storing tiny parts, such as screws and washers. This stops them from rolling away or getting lost.
A simple replacement can turn into a flooding mess if you don't shut off your water supply properly. Locate and shut off the correct valves before replacing a bathtub faucet.
To turn off your water supply:
Houses without access valves behind the tub need the main water shutoff valve. Look for this where the main water line enters your home, typically in the basement, crawlspace, or utility room.
Pro Tip: Fill a bucket with clean water before shutting everything off. You'll need it to clean parts or wet cloths for wiping away debris.
Older fixtures need extra patience during replacement. Good preparation helps the job go smoothly and gets your bathroom back in service faster.
You've got your workspace ready, so let's remove those old faucet parts. Your faucet type—slip-on or threaded spout—will determine the removal steps. Take photos as you work to help with installation later.
Slip-on spouts connect to copper pipes using a set screw. Here's how to take them off:
Pro Tip: For stubborn slip-on spouts, apply a penetrating lubricant, such as WD-40, around the connection point and wait 10-15 minutes before attempting removal again.
Threaded spouts connect directly to the pipe by screwing. Here's what you need to do:
You might need to cut through any caulk at the base with a utility knife if the threaded spout is very stuck.
Decorative caps usually cover the attachment screws on faucet handles. Here's the process:
Mineral buildup can make the handle parts stiff. Photos of each step will help you put everything back together correctly.
Cartridge removal might be needed to fix internal leaks or replace tub faucet stems:
|
Cartridge Type |
Removal Method |
Tools Needed |
|---|---|---|
|
Threaded |
Unscrew from the valve body |
Pipe wrench |
|
Pressure-fit |
Pull straight out with pliers |
Cartridge puller |
|
Retainer-clip |
Remove the clip, then pull out |
Needle-nose pliers |
After removing everything:
Check all removed parts for wear, corrosion, or damage. This will help you understand what caused any leaks or performance issues and buy the right replacement parts.

Your faucet type determines the installation method:
|
Faucet Type |
Installation Method |
Key Considerations |
|---|---|---|
|
Slip-on |
Slide onto copper pipe, secure with set screw |
Ensure the spout opening faces downward |
|
Threaded |
Apply plumber's tape, and screw onto the pipe |
Don't overtighten - hand tight plus 1/4 turn |
Slip-on spouts need to slide onto the copper pipe. You can tighten the set screw underneath with a hex key. Ensure the spout opening points directly downward.
Threaded spouts need plumber's tape wrapped clockwise around the pipe threads (2-3 layers). Thread the new faucet by hand first. Use a wrench to tighten gently, applying just enough force to secure the threads without damaging them.
Pro Tip: Snap a photo of your old faucet's position before removal. This helps arrange your new spout at the same angle.
Start by sliding the new handle over the valve stem. The screw or nut from your replacement kit secures it in place. Add any decorative caps that came with your fixtures. New valve installations need properly threaded and tightened stems.
Plumber's tape creates a watertight seal on threaded connections. Wrap it clockwise around the threads to keep it in place during installation.
The faucet spout and handles need a thin line of silicone sealant around their base. You can smooth it with your finger or a caulking finishing tool. Let the sealant dry completely - this usually takes several hours before testing.
Effective sealing prevents water from seeping behind walls and prevents mold growth or structural damage.
After installation:
Water leaks mean you should shut off the supply again. Try tightening connections slightly or adding fresh plumber's tape. The entire process of replacing a tub faucet typically takes 30-45 minutes, depending on your level of DIY experience.
Your new bathtub faucet might give you trouble despite a careful installation. Most problems are easy to fix. Let's get into the most common issues and their solutions.
A stuck faucet needs patience more than strength:
Pro Tip: Avoid using excessive force on a stuck faucet, as it could damage the pipe in your wall.
A new tub faucet that drips needs attention:
|
Leak Location |
Possible Cause |
Solution |
|---|---|---|
|
Spout dripping |
Worn valve stem/cartridge |
Replace internal valve components |
|
Base of the spout |
Loose connection or poor seal |
Rewrap threads with plumber's tape (2-3 layers) |
|
Around the set screw |
Loose fastener |
Tighten the set screw with a hex key |
Stubborn leaks need another look. Turn off the water, check all connections, and make sure you used enough plumber's tape on threaded parts.
Mineral buildup often causes low pressure in newly installed systems. Soak the parts in white vinegar for 20-30 minutes and scrub them gently with a soft brush. Your faucet may also have a removable flow restrictor that you can remove to increase water flow.
Replacing a tub faucet is one of the most approachable DIY plumbing tasks you can take on at home. This guide has shown you how to identify your faucet type, gather the right tools, remove old parts, and install new fixtures with precision. You also learned how to fix common issues that may arise during the process.
Knowing how to change a bathtub faucet starts with careful preparation and patience. Taking time to confirm whether you have a slip-on or threaded spout can prevent unnecessary store trips and ensure a smoother installation.
It's also crucial to protect your tub surface and drain from accidental damage while working. A strong, leak-proof seal using plumber’s tape and silicone caulk will keep moisture from seeping into your walls. Don’t rush this step—give the sealants several hours to fully dry before testing your new faucet.
If you’re wondering how to replace a tub faucet effectively, the answer lies in attention to detail and following each step thoroughly. Doing the job yourself can save a significant amount of money versus hiring a plumber. Additionally, the satisfaction of completing this upgrade adds confidence for future DIY projects—your bathroom now benefits from both improved functionality and a refreshed style.
GET THE ESSENCE OF RELEVANT HOME
IMPROVEMENT TOPICS IN LESS THAN 5 MINUTES

Thanks for joining our homeowners’ community.
Stay tuned!
Choose the category
Choose the category