Basement Flooring Guide 2025: What Works Best for Your Space
Basement flooring presents unique challenges that require different solutions than the rest of yo...

Bathroom sink problems can strike without warning, leaving you with annoying drips, slow drains, or worse. Professional repairs typically cost between $380 and $1,200, while full replacement averages $1,290. Many common issues, however, can be fixed with basic tools and the right approach. Sink damage usually develops from corrosion, harsh cleaning products, daily water exposure, and normal wear over time. Most bathroom sink repairs—whether you're fixing a leaky faucet, clearing a clogged drain, or patching a cracked basin—take less than 2 hours to complete. This guide walks you through fixing the most common bathroom sink problems step-by-step. You'll learn which tools to gather, when DIY makes sense, and when to call a professional instead. Always test for leaks after completing any repair by running water and checking all pipe connections.
Bathroom sinks develop predictable problems that can disrupt your daily routine. Water dripping constantly, pools forming under the cabinet, or slow drainage all signal issues that worsen without attention. Recognizing these problems early helps you address them before they cause expensive damage.
Leaky faucets rank among the most common bathroom sink issues. Those steady drips waste gallons of water and drive up utility bills. Most faucet leaks result from internal components that wear out with regular use.
Typical causes of faucet leaks:
Drain leaks usually start from loose connections or pipe cracks. Look for water puddles in the cabinet under your sink or wet stains on the pipes themselves. Left unchecked, these leaks damage cabinets and flooring, potentially creating mold problems and health concerns.
Pro Tip: Apply leak tape and a compression clamp to temporarily control a leaky pipe until you can make permanent repairs.
Basin cracks typically start as hairline fractures near the drain and expand over time. Thermal stress causes most cracks—rapid temperature changes make materials expand and contract. Pouring boiling water into a cold porcelain sink can create instant hairline cracks.
|
Cause |
How It Happens |
Most Vulnerable Materials |
|---|---|---|
|
Physical Impact |
Heavy objects dropped on surface |
Porcelain, fiberglass, glass |
|
Age and Wear |
Natural deterioration over years |
All materials, especially natural stone |
|
Rust Buildup |
Metal reinforcements corroding |
Sinks with steel framework |
|
Poor Installation |
Uneven mounting creates stress points |
All sink types |
Large porcelain cracks allow water leakage and structural damage. Even small cracks can harbor bacteria and create hygiene problems if you don't fix them promptly.
Slow drainage happens when debris accumulates in your drain system. Bathroom sinks collect hair, soap residue, toothpaste, and makeup products that get trapped in the drain, stopper, or P-trap.
Signs of a clogged bathroom sink:
When all sinks in your home drain slowly, you might have a bigger problem like pipe leaks, hidden clogs, or tree roots blocking the main sewer line. Frequent clogs despite regular cleaning often indicate deeper plumbing issues that need professional attention.
Minor clogs respond to plungers, drain snakes, or baking soda and vinegar mixtures. Persistent clogging problems require professional assessment to prevent flooding, pipe damage, or sewage backups.
Having the right equipment ready before starting any repair saves time and prevents frustrating trips to the hardware store mid-project. The tools you need depend on your specific problem—faucet leaks require different supplies than drain clogs or cracked basins.
Most bathroom sink repairs require several types of wrenches. Adjustable wrenches handle nuts and bolts of varying sizes, while basin wrenches reach the tight spaces behind sinks where mounting nuts hide. Pipe wrenches provide the grip needed for round drain pipes and fixtures.
Essential tools and materials for sink repairs:
|
Tool/Material |
Purpose |
Approximate Cost |
|---|---|---|
|
Adjustable wrench |
Loosening/tightening nuts and bolts |
$10-20 |
|
Basin wrench |
Reaching mounting nuts behind fixtures |
$15-30 |
|
Pipe wrench |
Gripping pipes during installation/removal |
$20-30 |
|
Plumber's tape (PTFE tape) |
Sealing threaded pipe connections |
$2-5 |
|
Plumber's putty |
Creating watertight seals around drains |
$3-8 |
|
Silicone caulk |
Sealing sink edges and preventing water damage |
$5-10 |
|
Drain snake/auger |
Removing clogs from drains |
$10-30 |
|
Bucket |
Catching water from disconnected pipes |
$5 |
|
Flashlight |
Illuminating dark cabinet spaces |
Varies |
|
Safety glasses |
Protecting eyes during repairs |
$5-15 |
Pro Tip: Buy replacement parts before taking anything apart. Bring old parts to the hardware store to ensure exact matches, especially for washers, O-rings, and cartridges.
Faucet repairs typically need replacement cartridges, washers, O-rings, or valve seats. These parts vary by brand and model, making proper identification crucial before you start.
Drain repairs usually require plumber's putty, drain baskets, P-traps, or slip joint nuts. Sink basin repairs might need epoxy putty for minor cracks or complete replacement kits for serious damage.
Choose sealants based on their specific application:
Keep spare parts like washers, O-rings, and aerators in your toolbox for quick fixes. Organize supplies in a dedicated container so everything stays accessible for future repairs.
Quality tools cost more upfront but pay for themselves through multiple DIY repairs, making bathroom sink maintenance more economical over time.
Bathroom sink repairs become manageable when you break them down into clear steps. Most homeowners can handle these common fixes with basic tools and patience. Here's how to tackle the three most frequent problems.
Leaky faucets waste water and create constant noise. Most leaks stem from worn internal parts that need replacement. Start by determining which side (hot or cold) leaks by shutting off one water valve at a time.
Follow these steps to fix your leaky faucet:
Pro Tip: Take photos during disassembly or arrange parts in order to remember correct positioning during reassembly.
Hair, soap scum, and debris commonly build up in bathroom sink drains. Try these methods from simplest to most involved:
You can repair minor cracks and chips, but structural cracks require sink replacement. For hairline cracks and chips:
For deep cracks or structural damage, replacement becomes necessary. If water leaks through cracks in your sink, it's time for a new one. Shut off the water supply, disconnect plumbing lines, remove the faucet, unfasten the sink from the drain pipe, and install the new sink following the manufacturer's instructions.
Pro Tip: Buy porcelain repair kits specific to your sink color rather than generic epoxy for better color matching and durability.
The plumbing components hidden beneath your sink often create the most challenging repair situations. Leaks in these areas can quickly damage cabinets and flooring if you don't address them promptly. Most plumbing repairs focus on two main areas: the drainage system (including pipes and traps) and the seals or washers that create watertight connections.
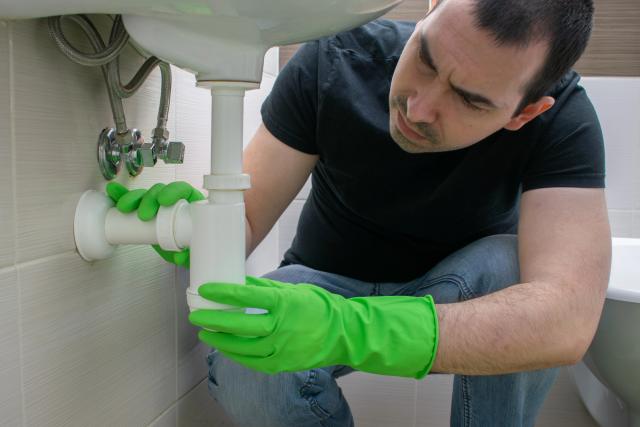
P-traps—the curved pipe section under your sink—serve an important function by trapping water to block sewer gases from entering your home. These components also catch debris that could otherwise travel deeper into your plumbing system. When P-traps fail or become clogged, here's how to address the problem:
Pro Tip: Avoid cross-threading the plastic threads when reinstalling P-traps. Metal nuts on plastic pipes often damage threads and cause leaks later.
For drains that remain slow after cleaning the trap, check the trap arm (the horizontal pipe that connects to the wall). Loosen the nut at the wall, pull the arm straight out, and look for blockages.
Seals and washers create the watertight barriers between plumbing components. These elements wear out over time and need replacement:
|
Seal/Washer Type |
Location |
Signs of Failure |
|---|---|---|
|
Conical washers |
P-trap connections |
Water is leaking at the pipe joints |
|
Flat washers |
Under-drain flanges |
Water seeping around the drain |
|
O-rings |
Faucet connections |
Dripping from the faucet base |
To replace a leaking sink drain washer:
If water continues pooling around your drain after tightening, apply plumber's putty or silicone sealant to create a proper watertight seal.
Knowing when to tackle a bathroom sink problem yourself versus calling a professional can save time, money, and headaches. While DIY repairs offer immediate cost savings, the wrong approach can create expensive damage down the line.
Most common sink problems fall within the skill range of typical homeowners. These repairs use basic tools and straightforward techniques that don't require specialized plumbing knowledge.
|
DIY-Friendly Repairs |
Tools Needed |
Difficulty Level |
|---|---|---|
|
Unclogging drains with a plunger or a snake |
Plunger, drain snake |
Beginner |
|
Replacing faucet washers or cartridges |
Wrench, screwdriver |
Beginner-Intermediate |
|
Cleaning/replacing P-trap |
Bucket, wrench |
Beginner |
|
Swapping out the faucet or sprayer |
Basic tools |
Intermediate |
Pro Tip: Always turn off the water supply before attempting any sink repair and place a bucket underneath to catch unexpected water.
Some situations require professional expertise, especially when DIY attempts fail to solve the problem. Professional plumbing repairs typically cost between $100 and $500, while DIY mistakes can double that amount.
Call a professional plumber when you encounter:
Professional plumbers bring specialized tools, diagnostic equipment, and liability insurance that protects your home if something goes wrong. Most professional work includes guarantees lasting 30 to 90 days.
Best for: DIY repairs work well for surface-level problems, while professional help handles complex plumbing systems and major damage.
Routine maintenance prevents most bathroom sink issues before they start. Simple weekly habits can save you from emergency repairs and extend your sink's lifespan significantly.
Clean your sink stopper weekly to remove hair and debris before it travels down the drain. Consider installing a drain guard or screen to catch buildup before it enters your plumbing system.
|
Maintenance Task |
Frequency |
Purpose |
|---|---|---|
|
Boiling water flush |
Monthly |
Dissolves soap scum and debris |
|
Baking soda & vinegar |
Regular |
Prevents clogs naturally |
|
Stopper cleaning |
Weekly |
Removes hair and buildup |
|
Professional inspection |
Annually |
Identifies potential issues |
Pro Tip: Remove hair from the sink immediately after shaving rather than letting it wash down the drain.
Harsh chemical drain cleaners can damage pipes and create health hazards, even though they dissolve clogs effectively. Enzyme-based cleaners work more slowly but use natural biological agents to break down organic buildup safely.
Gentler cleaning alternatives include:
Older homes benefit from twice-yearly inspections instead of annual checkups to catch problems early.
Most bathroom sink repairs fall within the capabilities of homeowners who have basic tools and follow proper procedures. You've now learned to diagnose common problems, from leaky faucets to cracked basins, and understand the difference between DIY-friendly tasks and those requiring professional expertise.
Prevention beats emergency repairs every time. Weekly cleaning routines, drain guards, and gentle cleaning products can extend your sink's life considerably. Catching small problems early prevents them from becoming expensive disasters.
Having the right tools makes all the difference. A well-stocked toolbox with wrenches, plumber's tape, and replacement parts means you can handle most issues as they arise. Quality tools pay for themselves through multiple repairs over the years.
Approach each repair with confidence, but respect your limits. Always shut off water supplies before starting work and test everything thoroughly when finished. Know when to call a professional—some problems are worth the cost of expert help to avoid bigger headaches later.
GET THE ESSENCE OF RELEVANT HOME
IMPROVEMENT TOPICS IN LESS THAN 5 MINUTES

Basement Flooring Guide 2025: What Works Best for Your Space
Basement flooring presents unique challenges that require different solutions than the rest of yo...

Bed bugs have made a significant comeback over the past decade, creating headaches for homeowners...

Thanks for joining our homeowners’ community.
Stay tuned!
Choose the category
Choose the category